
Your Yard, Ellen
Thanks for having me out. Here's everything we walked through, area by area, backyard first and then out front.
A theme you'll notice running through almost all of it: getting the rock off the soil and replacing it with compost and mulch. That isn't a cosmetic call. Rock over bare dirt bakes the ground, kills the biology in the top few inches, and leaves your plants with nothing to feed on. Every one of these areas gets better faster once the soil underneath is alive. The plants are the fun part, but the soil is what makes them work.
The side passage
Greenery you can see out the kitchen window.
Two walls, two completely different growing conditions
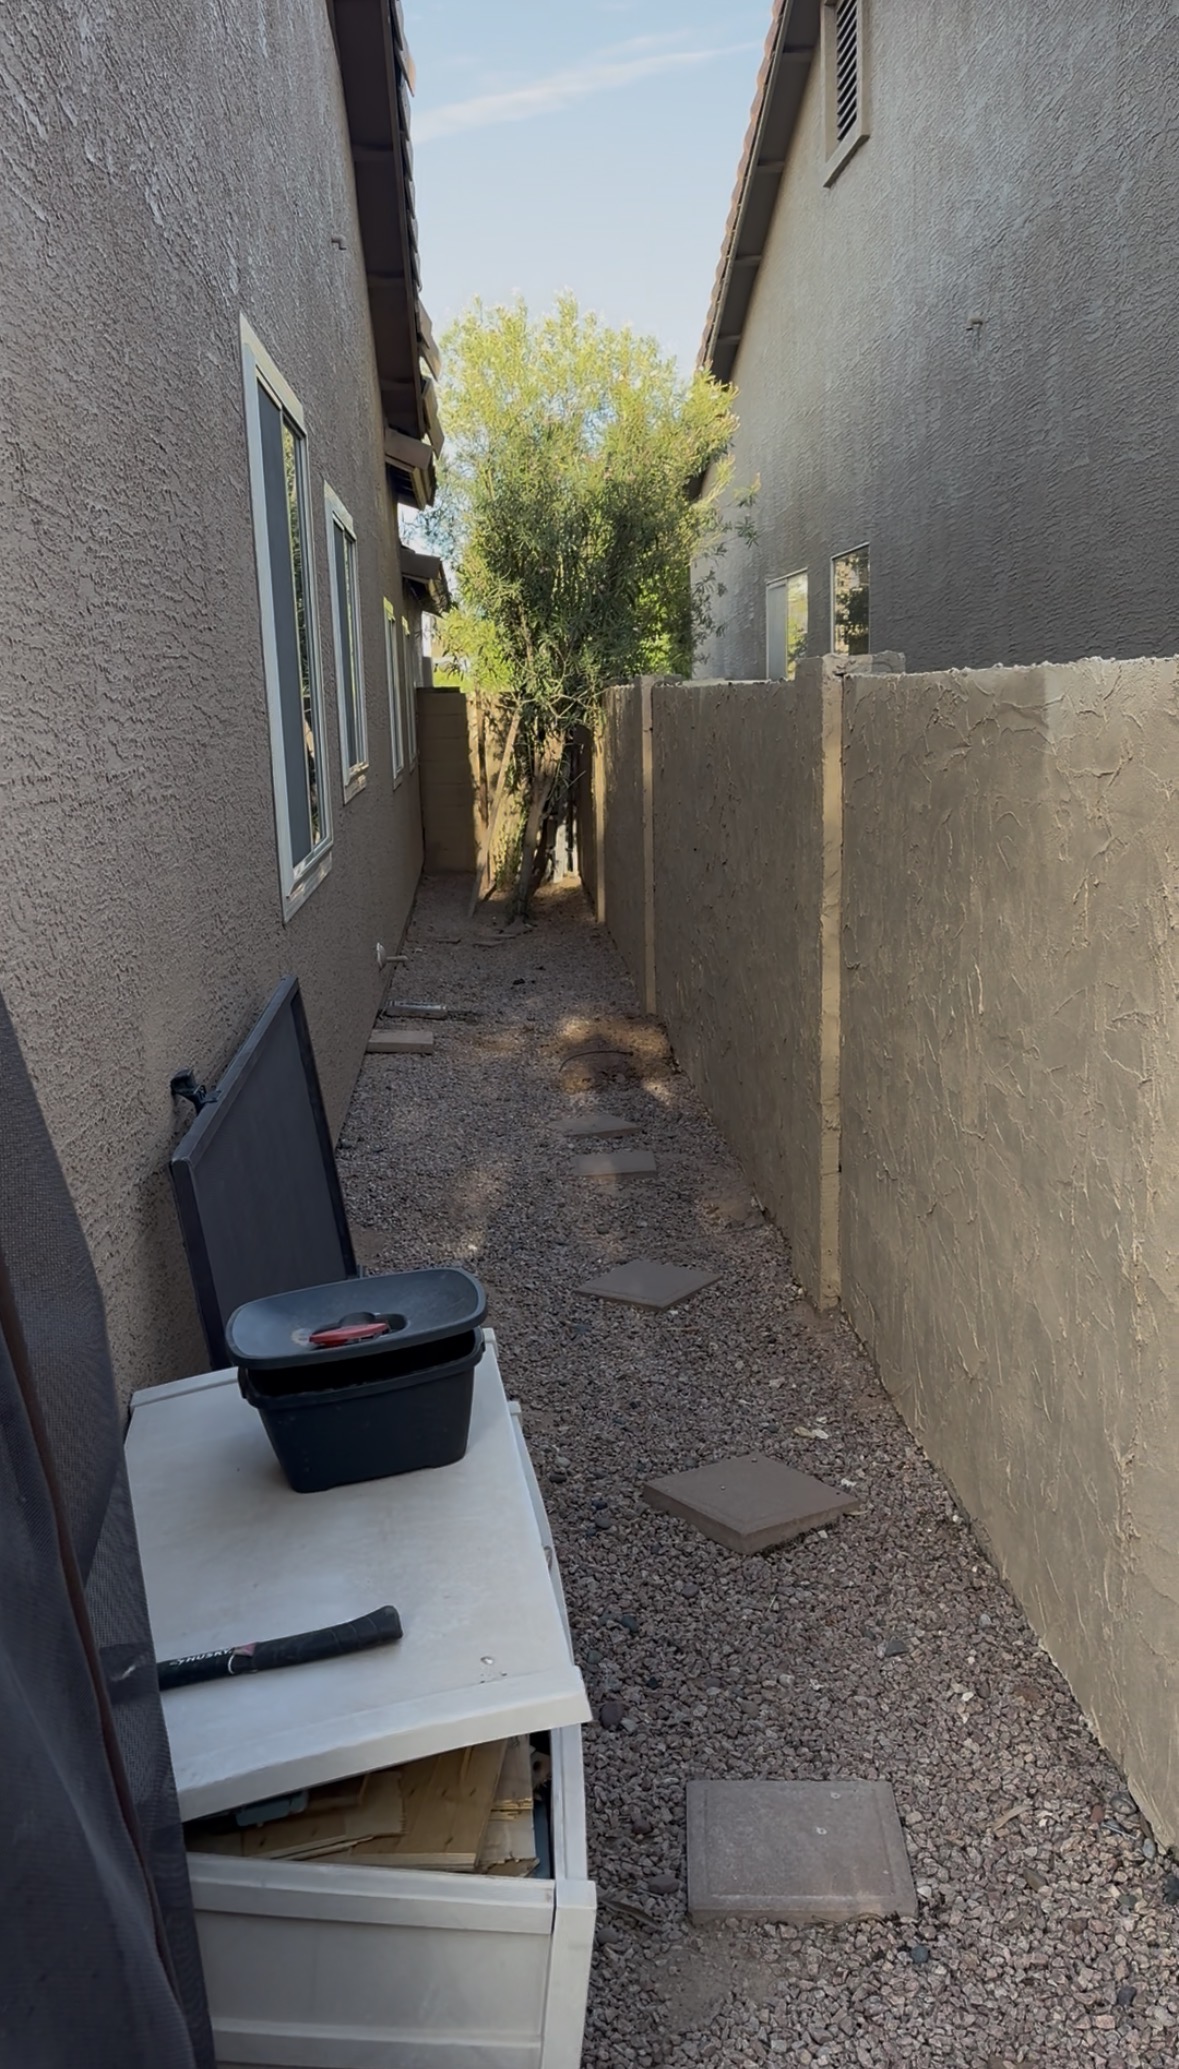
This is a skinny passage with the block wall on one side and the house on the other, and the goal is simple: you want to look out the kitchen window and see something green instead of a bare wall.
The thing to understand before picking plants is that these two walls are opposites. The block wall faces south, so it takes sun most of the day and holds heat. The house wall faces north, so it sits shaded for most of the year. A plant that thrives on one side will sulk on the other. It's worth planting both sides, though, because filling a narrow space from both directions is what makes it read as green rather than as a corridor with a hedge in it.
Whichever plants you use, the prep is the same. Pull the rock back, work compost into the planting area, and mulch over the top. In a tight passage the soil takes a beating from reflected heat off the block, and organic matter is what buffers that.
Against the block wall
Orange jubilee is my pick for this side. It flowers most of the year and doesn't slow down when summer sets in, which is a short list of plants in this exposure. Arizona rosewood is the alternative if you'd rather have permanent structure than seasonal color. And if you want something climbing the block rather than standing in front of it, either vine below will do that.

Orange Jubilee
Orange trumpet flowers through most of the year on an upright shrub that gets 8 to 10 feet. Takes full sun and reflected heat off block without complaint. Doesn't need much water once established.
The height is useful here, since it fills the wall vertically rather than just at the base.

Arizona Rosewood
A native evergreen that handles reflected heat off block better than almost anything. Dark leathery leaves, clean upright form, 10 to 15 feet if you let it.
Less color, more permanent structure. Good if you want the wall covered year round.

Tangerine Crossvine
Climbs on its own, covers block fast, orange trumpet flowers heaviest in spring with repeat bloom after. Evergreen most winters here.
Of the two vines, this is the tougher one on a hot south wall.
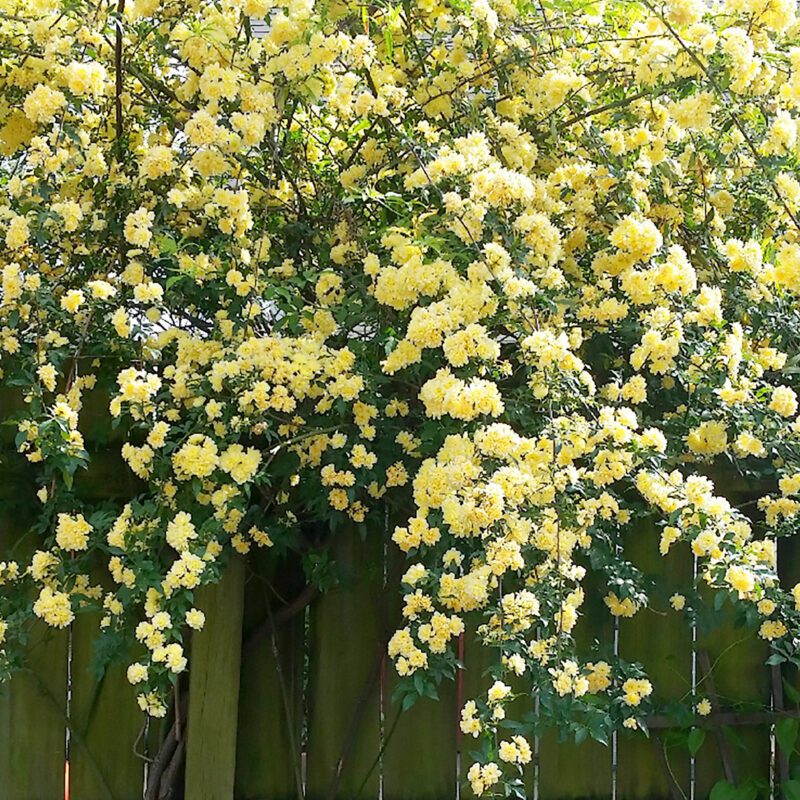
Lady Banks Rose
The climbing rose we talked about. Thornless, vigorous, and covered in small pale yellow flowers in spring.
It will do better here than on a west wall, though it still appreciates a little relief. Plan on slightly more water through summer than the others need.
Against the house
The house side is a different problem. Low light for most of the year, and the tecomas won't flower much in it. Twisted myrtle is my pick here. It's evergreen, it holds a tidy form in a narrow space, and it's genuinely happy in shade, which is a short list in the Valley.
Arizona rosewood is the other one that will tolerate this side if you want the same plant running down both walls for continuity. It'll grow slower and looser in the shade, but it will live.

Twisted Myrtle
Dense evergreen with dark green leaves and character trunks that twist as they age. Slow and well behaved, which is exactly what you want in a passage this narrow. Gets 6 to 8 feet.
Handles the shade on this side without going leggy, and it looks good from a window year round.
Arizona Rosewood
Works on either side, which makes it the choice if you want one plant running the whole passage.
Expect slower growth and a more open habit on the shaded side than on the block wall side.
The matching yellow bells run
Same plant carried over so the two sides read as one thing.
Yellow bells here too

Yellow bells is the right call for this spot. It's one of the few things that flowers steadily through a Phoenix summer instead of shutting down in June and picking back up in October. Bright yellow trumpets, fast growth, and it fills space quickly once it gets going.
Plant a few of them rather than one, spaced so they'll grow together into a continuous run. A single shrub sitting by itself reads as an accident. Three or five in a line reads as a planting.
Same prep as everywhere else. Rock back, compost into the planting area, mulch over the top, water it in.
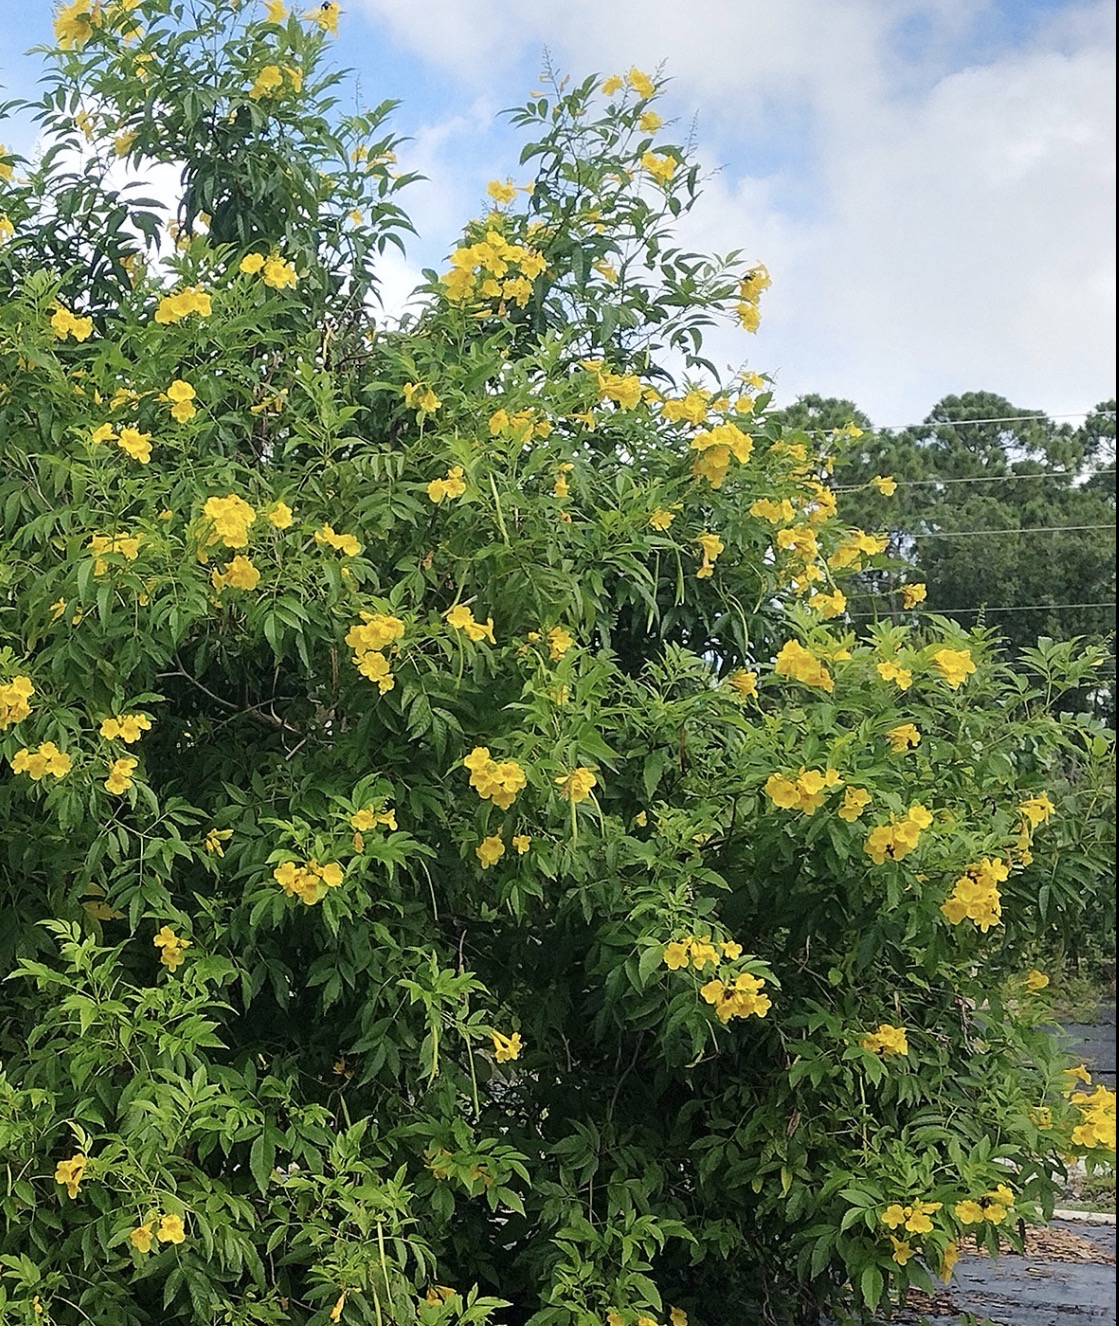
Yellow Bells
Yellow trumpet flowers most of the year, thrives in full sun and heat, doesn't need much water once established. Gets 6 to 8 feet and takes hard pruning if you want it tighter.
Cut it back in late winter and it comes back fuller every spring.
Orange Jubilee
If you'd rather break up the yellow, this gives you orange with identical care and toughness.
The blackfoot daisy area
Nothing to plant here. Just get the rock off it.
Pull the rock, put down mulch

This area doesn't need new plants. The blackfoot daisy in here is a tough little native and it's doing its job. What it's fighting is the same thing as everything else on the property: rock sitting on bare dirt, no organic matter, soil temperature swinging hard through the day.
- Rake the rock back out of the planting area. You don't have to haul it all off, just get it out from over the root zone.
- Top dress with quality compost, an inch or so, right over the existing soil. No tilling needed.
- Two to three inches of wood mulch over the compost, kept a few inches back off the stems.
- Water it in. That's what carries the biology down into the soil instead of leaving it sitting on top.
Even tough natives do better with living soil under them than with rock. You'll see it in the flowering within a season.
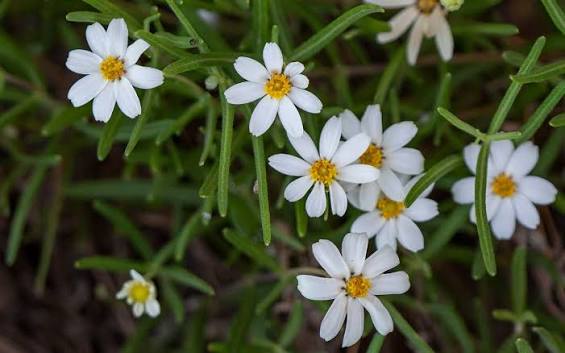
Blackfoot Daisy
Low mounding native with small white daisy flowers most of the year. Doesn't need much water once established and handles full sun fine.
Keep it. If you want to fill in around it later, more of the same is the simplest answer.
The red hibiscus bed
Rock out, soil rebuilt, hibiscus in, groundcover underneath.
This one needs the soil rebuilt first

You want red hibiscus here, and that works, but it comes with a condition. Tropical hibiscus is a heavy feeder with shallow roots. It wants soil with organic matter in it and consistent moisture, which is the opposite of what a rock bed provides. Put one in bare dirt under rock and you'll spend the next two years wondering why it looks yellow and tired.
What we'd do
- Remove the rock from this bed entirely. All of it, not just where the plants go.
- Lay down quality compost across the whole bed, an inch or two.
- Plant the hibiscus, working compost and organic fertilizer into the backfill.
- Mulch over the top, two to three inches, kept back off the stems.
- Groundcover underneath to knit the bed together and shade the soil.
For the groundcover, yellow dot or purple heart. Both spread readily, both take the heat, and both do the job of keeping soil covered so it doesn't bake. Yellow dot gives you small yellow flowers and a low green mat. Purple heart gives you deep purple foliage, which is a striking base under red hibiscus if you want the contrast.

Red Hibiscus
Big saucer flowers through the warm months, glossy dark green leaves. Wants morning sun with some afternoon relief, regular water, and rich soil.
Feed it well and it blooms spring through fall.

Yellow Dot
Fast low spreader with small bright yellow flowers most of the year. Fills in quickly and keeps soil shaded and cool.
Give it an edge to grow against, because it will keep going if you let it.

Purple Heart
Deep purple stems and leaves with small pink flowers. Spreads into a loose mat, takes sun or part shade, and comes back hard after frost knocks it down.
Under red hibiscus this is the more dramatic of the two.
The olive tree
Turf out, soil built, shade tree in.
Take the turf out before the tree goes in

An olive is a good call for this spot. They're long lived here, they handle our summers without drama, and they throw the kind of open dappled shade you can actually plant underneath later.
The important part is removing the turf first rather than cutting a hole in it. Grass roots occupy the exact top layer of soil where a young tree wants to establish, and they're extremely good at winning that fight. Clear a generous circle, bigger than you think you need.
- Remove the turf across the planting area, roots and all.
- Compost over the cleared ground before anything goes in.
- Plant the olive with the root flare at or slightly above finished grade. Never buried.
- Mulch two to three inches over the whole area, held back six inches from the trunk.
- Water deep and infrequent from the start so roots go down instead of sideways.
Fruitless Olive
Silver green evergreen foliage, gnarled character trunk as it ages, light dappled shade. Gets 25 to 30 feet with a similar spread over time.
Doesn't need much water once established, and it lives for decades here.
The pots on the wall
Fresh soil, then seasonal color you swap twice a year.
The soil in those pots is spent

Before we plant anything, the mix needs replacing. Potting soil breaks down, compacts, and loses its ability to hold water and air. In full sun on top of a block wall that happens faster than most people expect. You can pour water in and have it run straight through without ever wetting the root zone.
- Dump the old mix and check that the drain holes are clear.
- Refill with a living soil blend. I'd get this from Arizona Worm Farm here in Phoenix. Their potting soil and compost are biologically alive, which is the whole difference. Bagged mix off a big box shelf has been sitting sterile in plastic for months.
- Feed with an organic fertilizer at planting, then again halfway through each season. Pots leach nutrients fast because you're watering so often.
- Refresh the top few inches with their compost each time you swap the planting.
Seasonal color, swapped twice a year
In Phoenix the cool season is when flowers actually perform, so that's the planting that does the heavy lifting. October is the month to get them in. The summer planting is a shorter list because most annuals simply won't take our July.
Cool season, plant in October
- Petunias for volume and trailing over the pot edge.
- Snapdragons for height in the center of a pot.
- Pansies and violas for dense low color, and they take a frost fine.
- Alyssum spilling over the sides, and it smells good.
- Dianthus and stock if you want fragrance and a longer run into spring.
- Calendula for warm orange and yellow tones.
Warm season, plant in April
- Vinca is the workhorse. It thrives in heat that kills everything else.
- Portulaca and moss rose for low succulent color that shrugs off sun.
- Angelonia for upright spikes that bloom all summer.
- Celosia and zinnia for bold color, though zinnia wants regular water.
- Lantana if you'd rather plant once and leave it. It's perennial here and will come back.
If you'd rather not swap them twice a year
There's a permanent option worth considering. Desert milkweed does well in a container, holds its silver green upright form year round, and needs almost nothing from you. Plant it once and it just stays. It also brings monarch and queen butterflies, which is a nice thing to have happening right at eye level on a wall.
You could also split the difference. Put desert milkweed in a couple of the pots as the permanent anchors and keep one or two for seasonal color you swap out. That way you get the changing color without redoing every pot twice a year.

Desert Milkweed
Upright silver green stems with a sculptural look and small cream flowers. Native, doesn't need much water once established, and it holds its shape year round.
Host plant for monarch and queen butterflies. Plant it and you'll get caterpillars, which is the whole point.
The gardenia
Rock off, mulch on, compost monthly.
Gardenias in Phoenix need help, and this is the help

Gardenias are not naturally suited to what we've got here. They want acidic soil with lots of organic matter, and our soil is alkaline and mineral. Rock on top makes it worse on both counts. That yellowing you see on gardenias all over the Valley is the plant unable to pull iron out of soil that's too alkaline for it.
The fix is not an iron supplement, or at least not primarily. Iron chelate treats the symptom for a few weeks and then you're back where you started. What actually changes things is organic matter, because as compost breaks down it lowers pH in the root zone and feeds the biology that makes minerals available to the plant in the first place. That's a durable fix instead of a rented one.
- Pull the rock away from the base and out to the edge of the canopy.
- Two to three inches of wood mulch, kept back off the stems.
- Compost once a month, a shovelful or so worked into the top of the mulch. This is the piece that does the work.
- Water deeply rather than in short frequent bursts, and keep it consistent. Gardenias drop buds when they dry out.
Give it a few months of that and you'll see the leaf color come back before you see anything else change.
The tree with the water well
Move the water out, get the soil off the trunk.
Two problems, both fixable in an afternoon

First, the water well right up against the trunk needs to come out and the watering needs to move outward. A tree's feeder roots are not at the trunk, they're out toward the edge of the canopy and beyond. Watering at the trunk keeps the base constantly damp, which is exactly the condition that rots trunk bark, while the roots that actually drink sit dry.
Pull the berm back and extend the watering out to the drip line, the circle under the outer edge of the branches. That's where the water should be going.
Then get the soil off the trunk
The other issue is dirt piled against the trunk, burying the root flare. The flare is where the trunk widens out into the main roots, and it's supposed to be visible. When it's buried, trunk bark sits wet, decay gets in, and roots start circling the trunk instead of heading away from it. Over years those circling roots strangle the tree.
Here's a short video where I show what this looks like and how it gets fixed.
If the video doesn't load, watch it here: youtu.be/mLCVVxdvxU8
- Use a hose on a jet setting to wash the soil away rather than a shovel near the trunk. Steel tears bark and roots.
- Work outward in layers, an inch or two at a time, all the way around.
- Stop when the trunk visibly widens and you can see the tops of the main roots leaving it.
- Leave it exposed. Don't backfill. Mulch the area but hold it six inches off the trunk.
- Do this October through March while the tree isn't under heat stress.
- Compost around the root zone afterward, out at the drip line where those feeder roots are.
The planters by the walkway
Swapping the fake plants for something real.
Low light here, so the list is short

These have artificial plants in them now, and swapping them for something living is an easy win. It's not a big undertaking, so I don't want to overcomplicate it.
The orientation here is the limiting factor. There isn't enough direct sun for most of what you'd normally put in a pot, so a lot of the usual suggestions would just sit there and slowly decline. Two things will genuinely be happy in this spot.
Snake plant is the one I'd start with. Purple heart is the second, and it also gives you the option of tying these planters to the hibiscus bed out back if you use it in both places.
Either way, refresh the soil in these first. Same as the wall pots: dump the old mix, refill with a living soil blend, and feed with an organic fertilizer at planting.
Snake Plant
Stiff upright sword shaped leaves, often with pale banding or yellow margins. Thrives in low light, tolerates neglect, and holds a clean architectural shape indefinitely.
Close to impossible to kill as long as you don't overwater it. Let the soil dry out between waterings.
Purple Heart
Deep purple stems and leaves with small pink flowers. Takes sun or shade, spills over a pot edge nicely, and comes back hard after frost knocks it down.
The color does a lot of work in a spot with less light.
The walkway
Lining both sides of the path.
Plant both sides so the path feels like it goes somewhere

Everyone who comes to your door walks this. Planting both sides rather than one is what turns it from a path across a yard into an actual approach to the house.
Ruellia and desert milkweed are the two I'd anchor with. Chuparosa and San Marcos hibiscus are the other two worth considering, and both bring hummingbirds in close, which is worth something on a walkway you pass every day.
Don't plant one of each. Pick two, maybe three, and repeat them down both sides. Repetition along a path looks deliberate. A collection of singles looks like leftovers.
Same prep here as everywhere: rock back, compost worked into the planting area, mulch over the top.
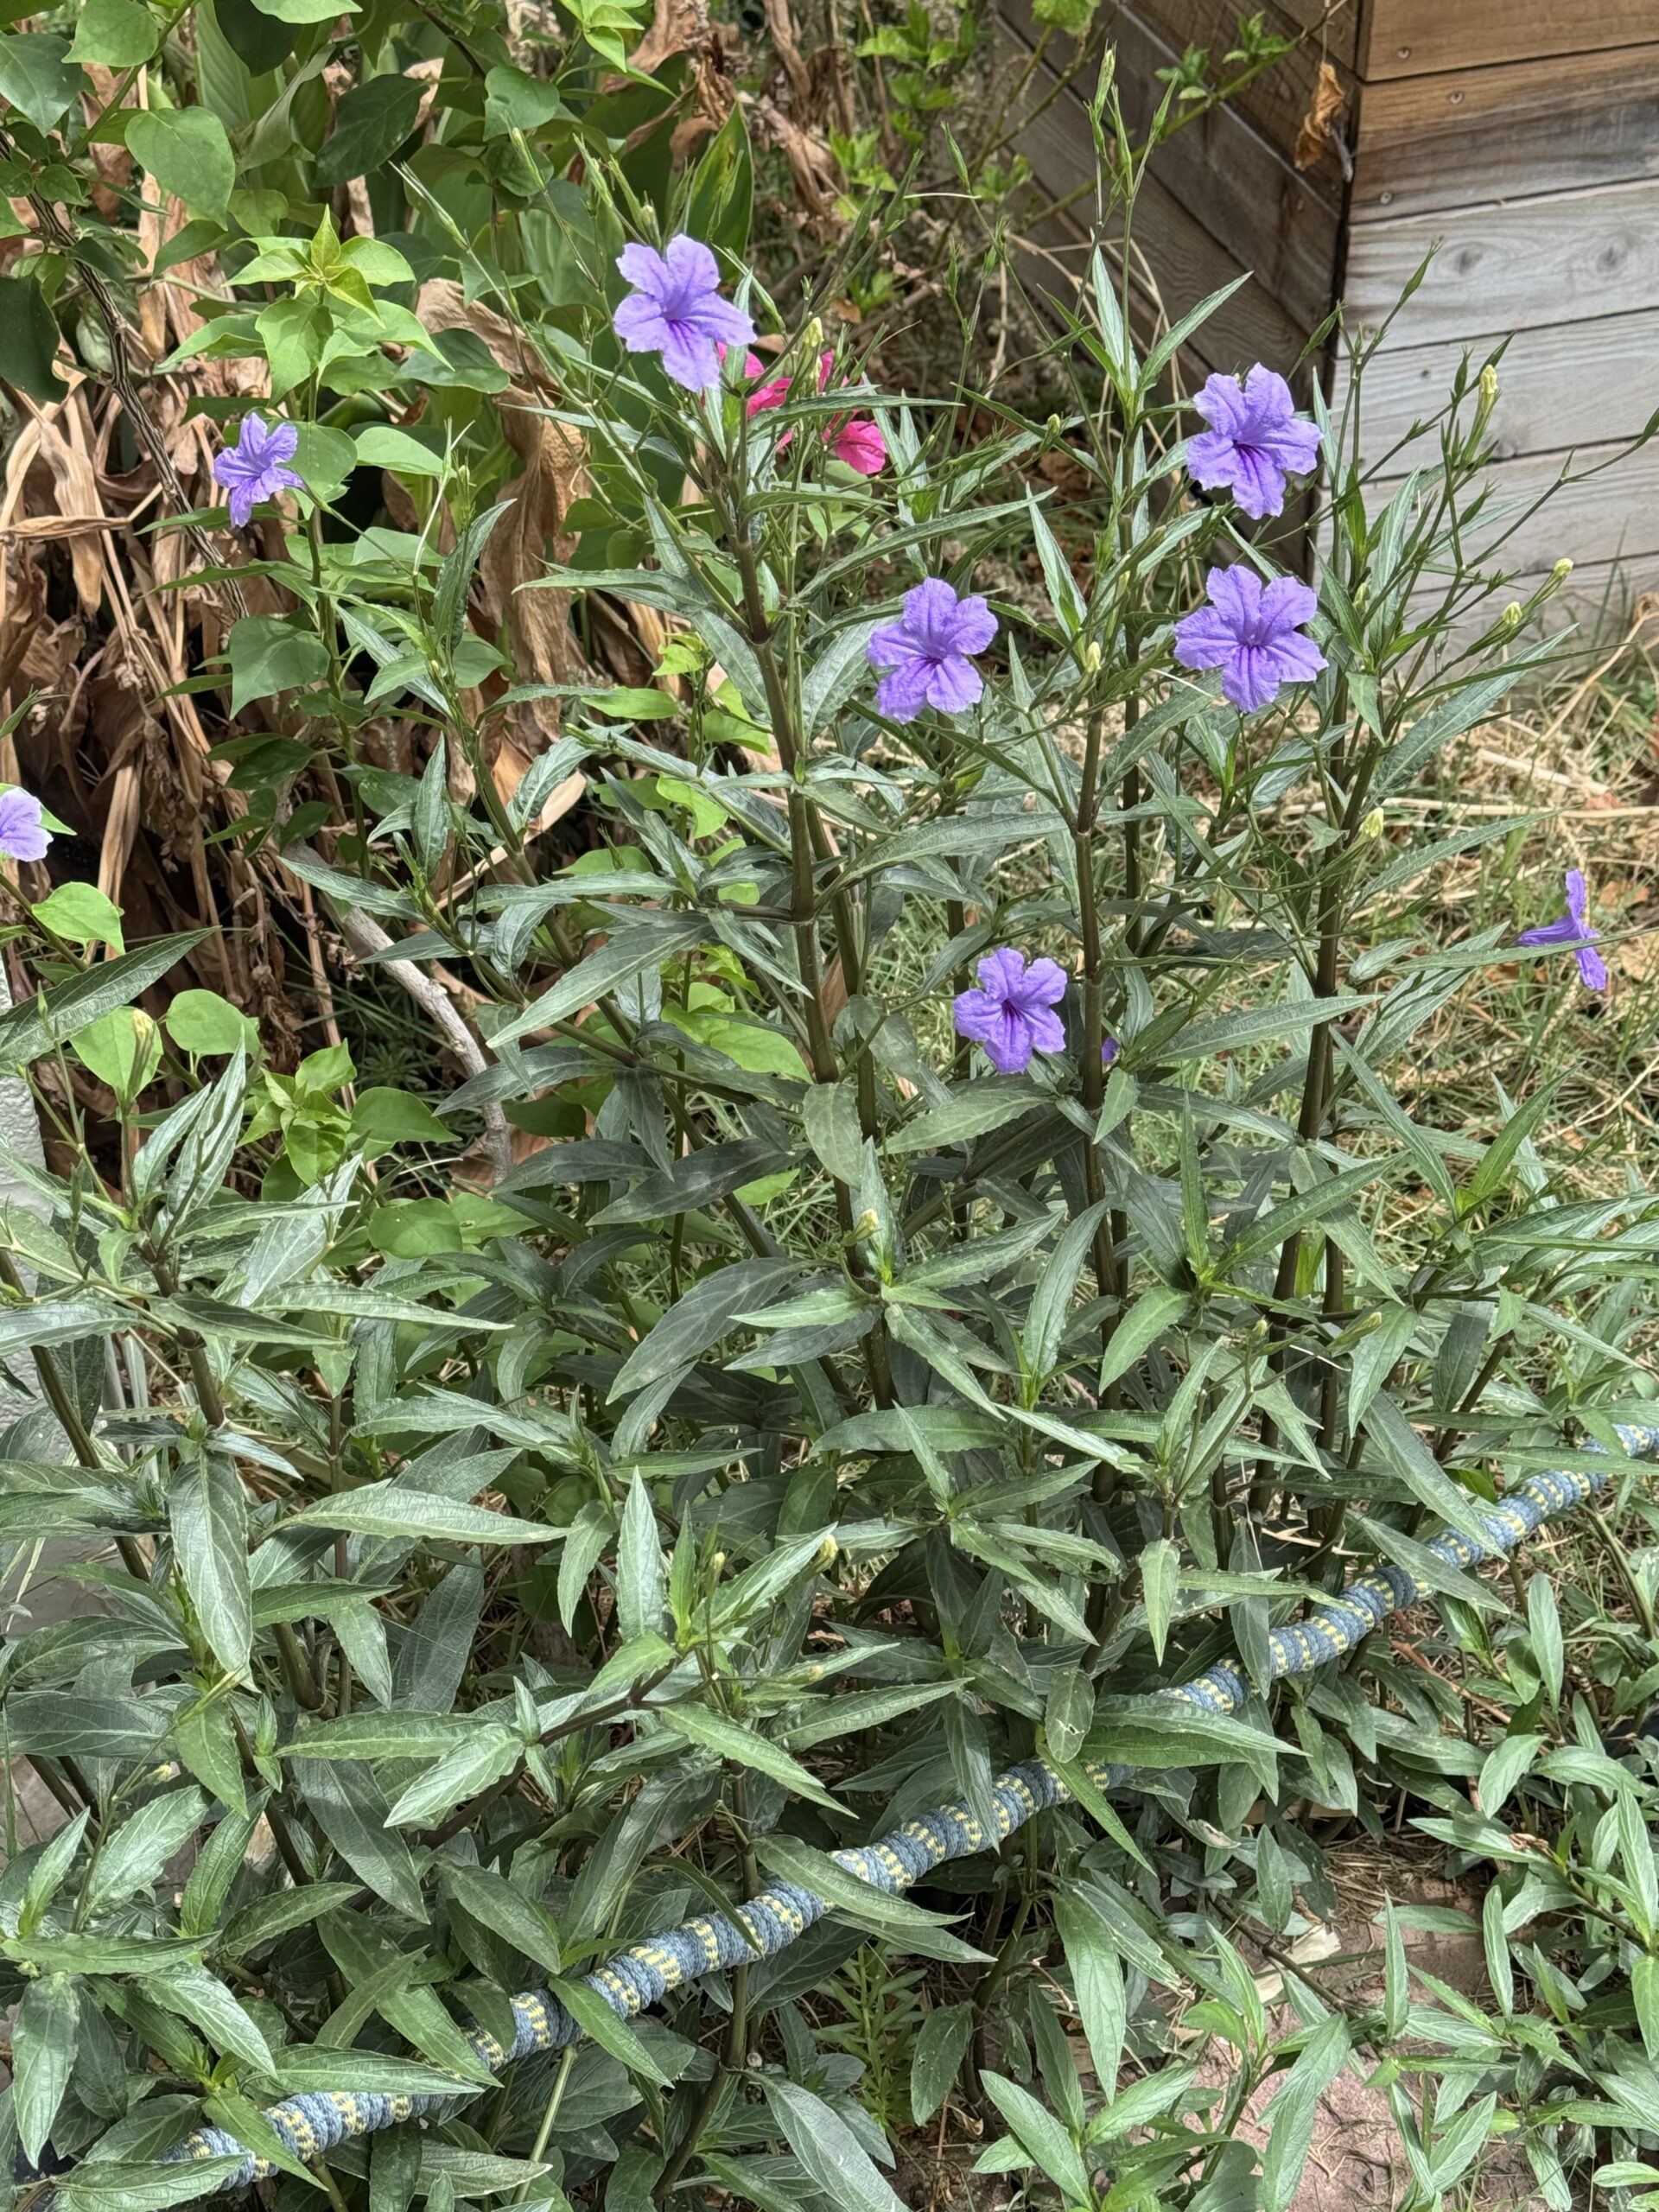
Ruellia
Purple trumpet flowers over deep green foliage, blooming spring through fall. Takes full sun and heat, and stays manageable alongside a path.
One of the most reliable long bloomers we have here.
Desert Milkweed
Upright silver green stems with a sculptural look and small cream flowers. Native, doesn't need much water once established.
Host plant for monarch and queen butterflies. The vertical form is a nice contrast against a low mounding plant next to it.
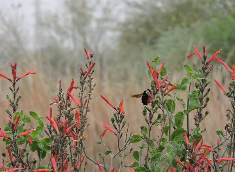
Chuparosa
Sonoran native with red tubular flowers through the cool season and into spring, on an open airy frame. Doesn't need much water once established.
Hummingbirds work this one constantly. It blooms when the yard needs it most.
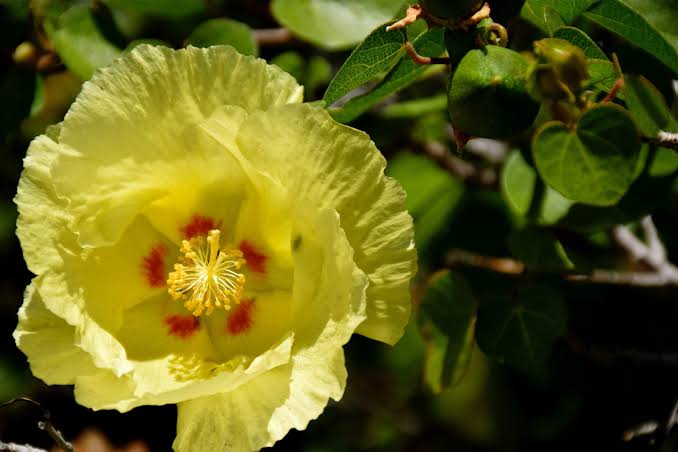
San Marcos Hibiscus
Bright yellow flowers with a red center, blooming through the warm months over glossy round leaves. Compact at 3 to 4 feet and evergreen in mild winters.
Nothing like the tropical hibiscus in terms of water needs. This one is genuinely tough.
The mound
Groundcover to hold it and cover the soil.
Something spreading, so the whole mound reads as planted

Raised ground sheds water and dries out from the top, so anything going here needs to be genuinely tough and it needs to spread. Groundcover does two jobs at once: it makes the mound read as planted instead of as a rock pile, and the covering foliage keeps soil temperature down and moisture in.
Globe mallow is the one I'd start with. Emu bush is the other one worth having, and trailing lantana is the fastest way to actually cover ground if that's the priority.
Prep matters more here than almost anywhere. Get the rock off, compost worked into the top few inches, and mulch over it. On a slope the mulch also slows water down long enough for it to soak in instead of running off the side.

Globe Mallow
Silver gray foliage covered in orange cup flowers through spring, with repeat bloom after rain. Native, doesn't need much water once established.
Cut it back hard after flowering and it comes back fuller.
Emu Bush
Australian native that handles our conditions as well as anything local. Tubular flowers in red, pink, or purple depending on variety, blooming in the cool season when the yard needs it most.
Low spreading forms like Valentine and Outback Sunrise work well on a mound.
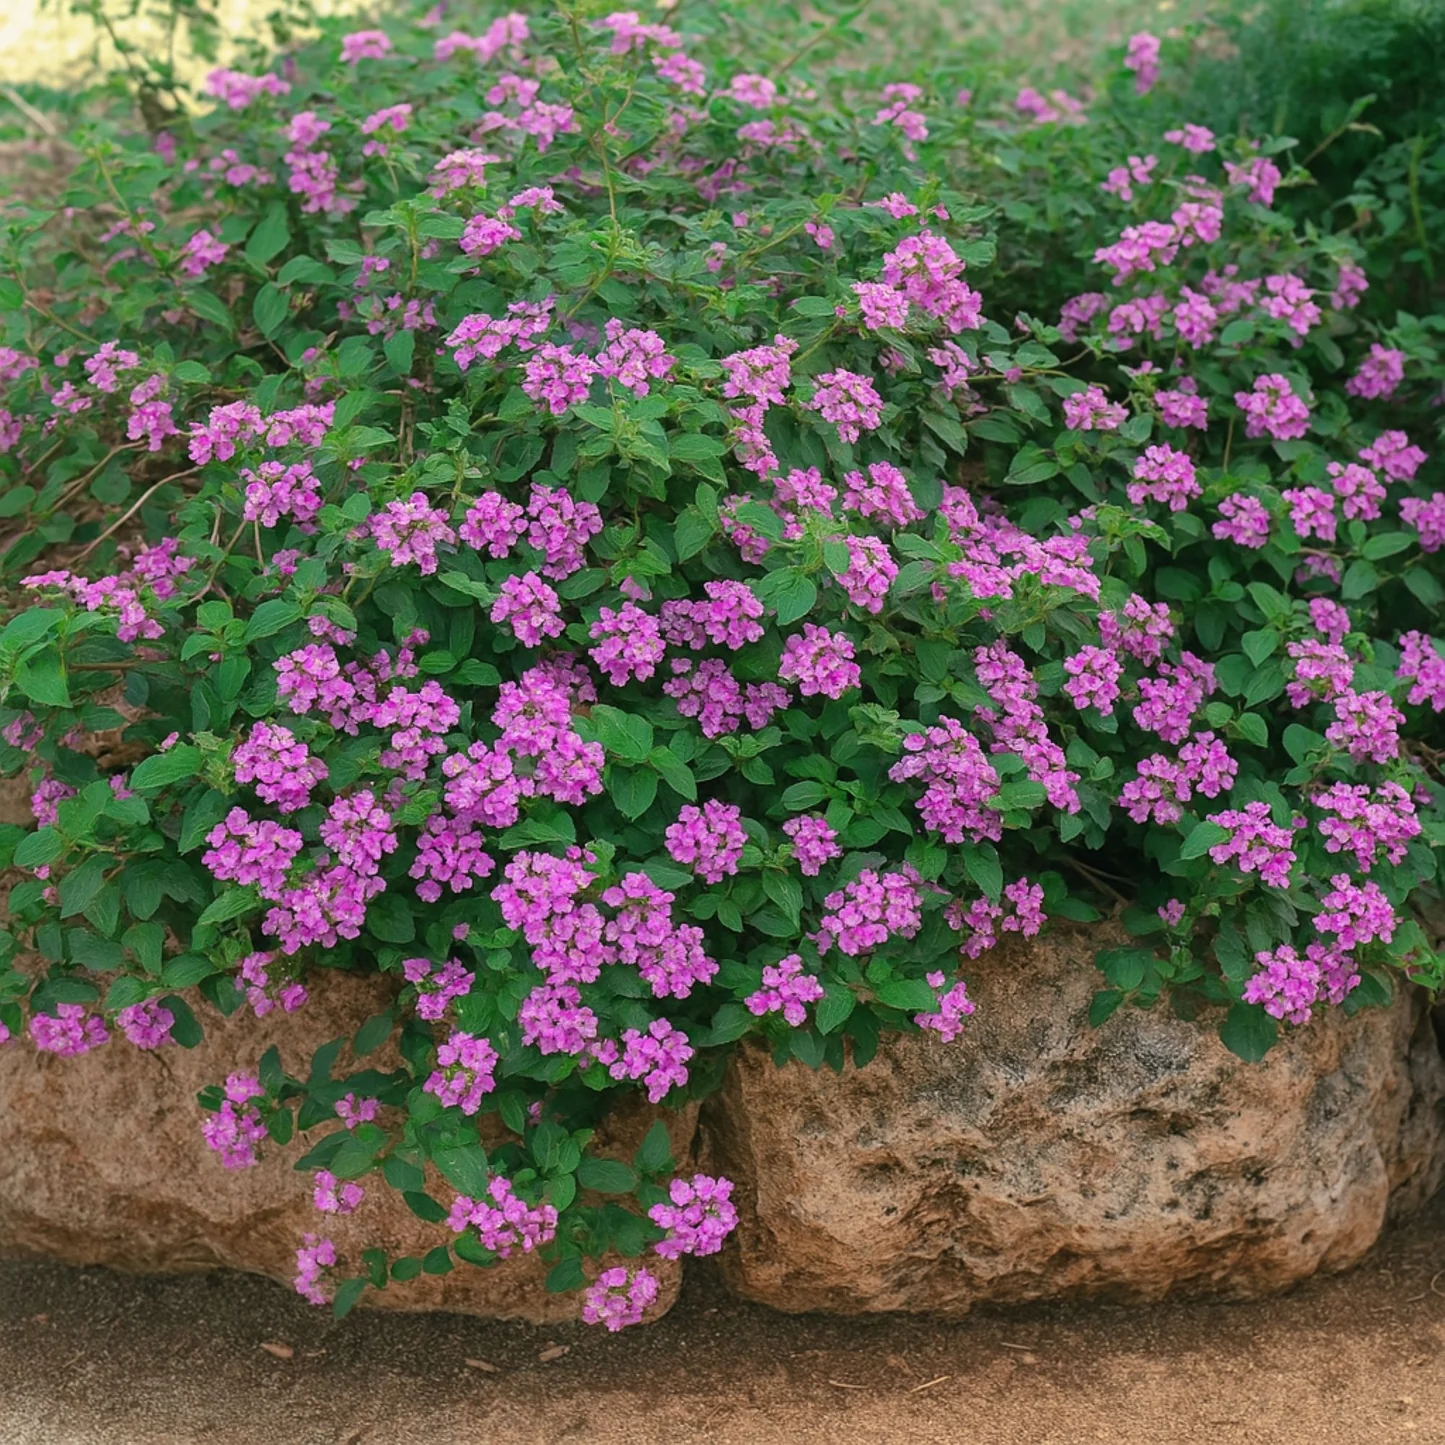
Trailing Lantana
The fastest way to cover ground on this list. Purple or white flowers nearly year round, and it spills over edges nicely on raised ground.
Frost knocks it back in winter and it returns in spring. Cut the dead growth off in February.
Blackfoot Daisy
Same plant you already have out back. Low white daisy mounds, very tough, very low water.
Worth mentioning because repeating it here ties the front and back together.
The front of the house
Filling in between the bougainvillea.
West facing, so everything here has to earn its spot

This side takes direct afternoon sun through the hottest part of the day, plus whatever heat radiates back off the house and the driveway. The bougainvillea handles it, which tells you the bar. Anything going between them needs to be in the same league.
Pink muhly grass is a good call and it will work here. The soft texture is a nice contrast against bougainvillea, which is all mass and color with no fine detail. It also does its best work in fall, when it throws pink flower plumes right as the bougainvillea is winding down.
A few more that will hold up in this exposure, in case you want options or want to mix textures between the shrubs.
Prep is the same as everywhere. Rock pulled back, compost worked in, mulch over the top. West-facing soil takes more abuse than anywhere else on the property, and organic matter is what buffers it.
Pink Muhly Grass
Fine green foliage most of the year, then a cloud of pink flower plumes in fall that catches low light beautifully. Gets 2 to 3 feet.
Cut it to a few inches in late winter and it comes back fresh. Doesn't need much water once established.
Pink Fairy Duster
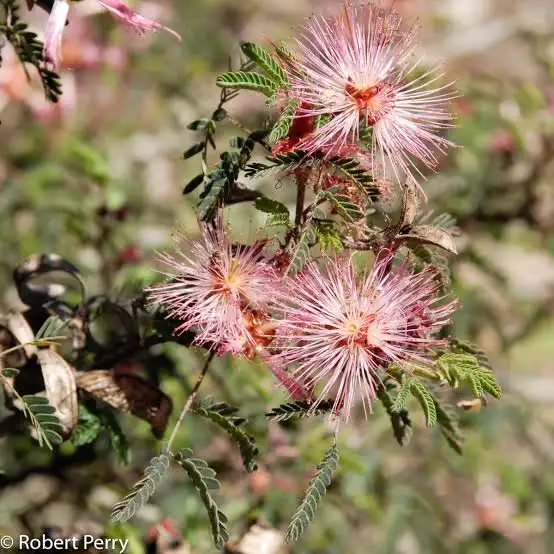
Native with soft pink powderpuff flowers in spring and again after summer rain, over fine feathery foliage. Low and airy at 2 to 3 feet.
Picks up the same pink as the muhly and keeps the texture soft between the bougainvillea.
Red Bird of Paradise
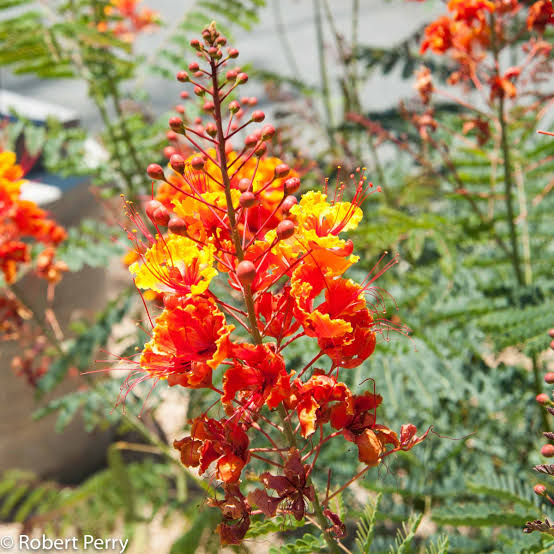
Orange and red flower clusters all summer long, on a shrub that gets 6 to 8 feet. One of the few things that blooms hardest in July and August.
Frost knocks it to the ground and it returns every spring. Cut it back to a foot in February.

Texas Sage
Silver gray foliage with purple flowers that burst out after humidity or rain. Gets 4 to 6 feet and needs almost nothing from you.
The silver reads well against bougainvillea. Leave it unsheared and it looks far better than the meatballs you see around town.
South side of the driveway
A flowering tree.
You want flowers, so let's pick for flowers
South side of a driveway means full sun and reflected heat off the concrete, which rules out a lot of the flowering trees people wish they could grow here. These three all take it.
They're different enough in character that it's worth reading through before deciding. Texas olive is the toughest and the most consistent bloomer. Hong Kong orchid is the showiest by a wide margin but the least cold hardy. Cascalote is the most sculptural and blooms in winter, which is unusual and useful.
Whichever you pick, plant it in the cool season with the root flare at or slightly above grade, compost and organic fertilizer worked into the backfill, and mulch out to the drip line held back off the trunk.

Texas Olive
Large white crepe paper flowers with yellow throats, blooming spring through fall and heaviest after rain. Broad green leaves, evergreen in mild winters. Gets 15 to 20 feet.
Doesn't need much water once established. Frost may nip it in a hard winter but it recovers.

Hong Kong Orchid
Large magenta and purple orchid shaped flowers from fall into spring, on a spreading canopy that gets 20 to 25 feet. Nothing else here looks like it in bloom.
The trade off is cold. It wants frost protection in the first few winters and can get nipped in a hard freeze even when mature. Worth it if you want the show.
Cascalote
Upright yellow flower spikes through winter, followed by decorative seed pods. Compact at 15 to 20 feet, evergreen, and doesn't need much water once established.
Blooming in December and January is genuinely rare here. Look for a thornless variety like Smoothie if it'll be near where people walk, since the species has serious thorns on the trunk.
The part that makes all of it work
Why I keep coming back to soil
You'll notice the same recommendation in almost every area above: rock off, compost down, mulch on top. That's not filler. It's the actual mechanism.
Plants feed through a partnership with the bacteria and fungi living around their roots. The plant pushes sugars out into the soil, that feeds the microbes, the microbes make minerals available in a form the plant can take up, and the whole exchange happens in that top layer of soil. Rock over bare dirt shuts it down. Soil temperatures under rock get high enough to sterilize the top few inches, and with no organic matter going in there's nothing feeding the system anyway.
Compost restores the biology. Mulch protects it and feeds it as it breaks down. Once that's running, plants get what they need on demand instead of in the spikes and crashes you get from a synthetic feed, and they hold up dramatically better through summer.
Our monthly fertilizing program
We come out every month with a liquid biological blend that goes on everything in the landscape: trees, shrubs, groundcovers, and pots. Three times a year we bring compost and top dress the beds, which is what actually rebuilds the soil over time rather than just feeding what's already there.
After every visit we send you a short recap video walking your yard so you can see what we did, what's improving, and anything we noticed that needs attention.
Full property program
No contract. Cancel any time. The program covers feeding and soil building only, and does not include the planting or cleanup work described above.
Where to go from here
Everything in here is doable in pieces. If you want a starting point, I'd do the rock removal and compost first across all the beds, because that improves what you already have before you spend a dollar on new plants. Then plant in the cool season, October through March, which is when things establish here.
If you'd like us to handle the planting, just let me know which areas you want to move on and I'll put together a proposal with plant sizes, quantities, and pricing.
You can also see everything we offer here: thegardennerd.org/planting-services