
Thanks for having me out, Connie. Below is everything we went over, in the order we walked the yard, with the extra details on each so you have it all in one place.
As a consult client, you're already in the Garden Nerd Club, so you have direct access to me there. If questions come up while you work through any of this, ask me there anytime.
Where to start
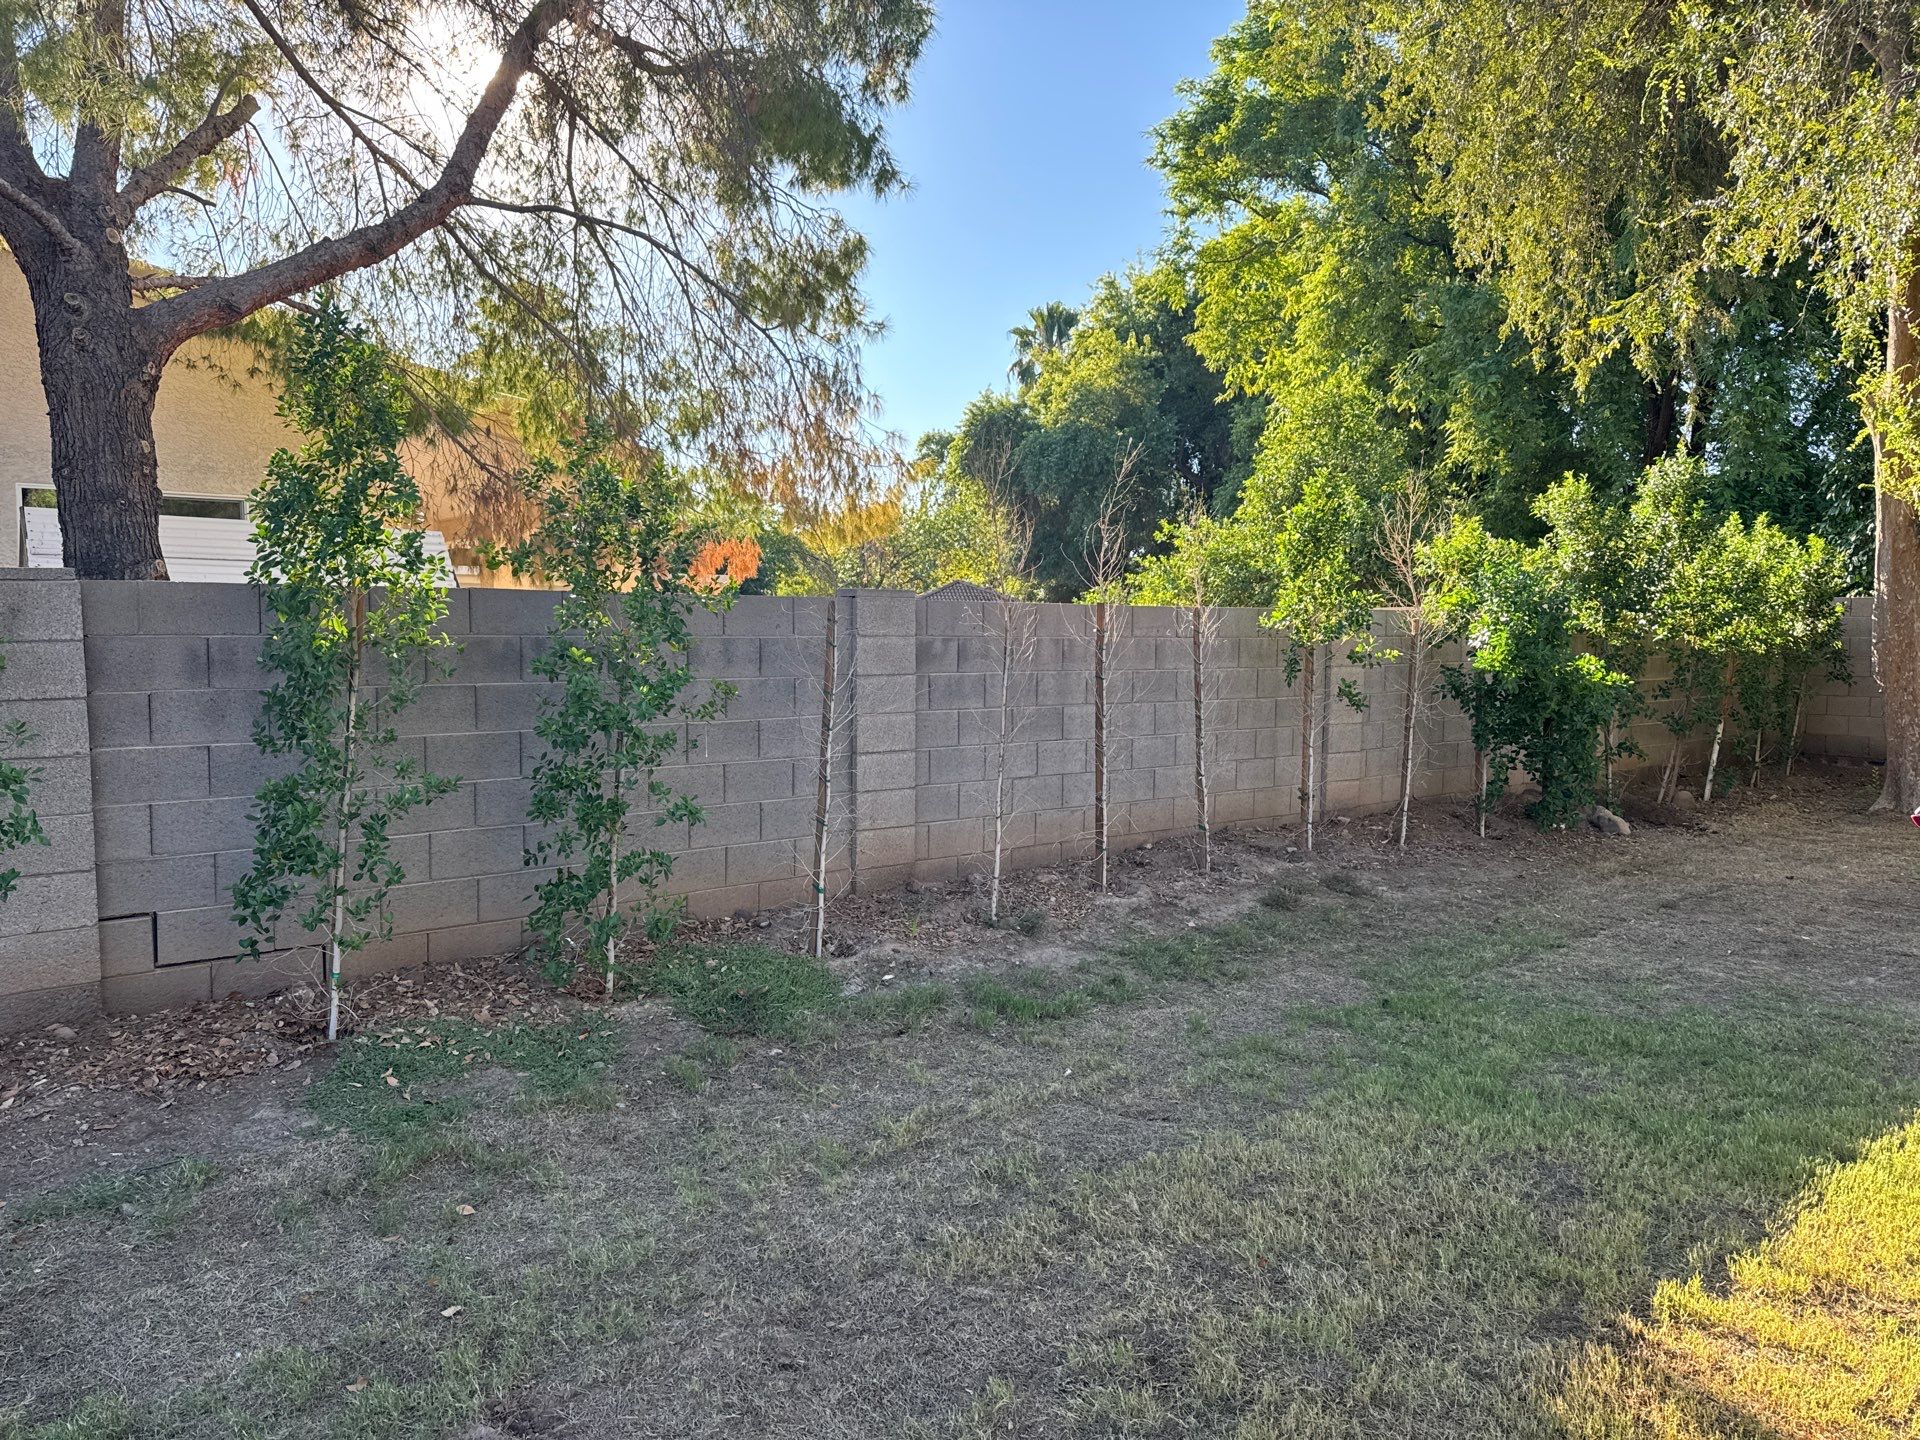
Ficus along the back wall: planted too deep and staked wrong
Every one of the ficus along this wall is planted too deep. The spot where the trunk widens out into the roots, the root flare, is buried under soil. That bark isn't meant to stay wet and covered, so over time it softens, rots, and invites roots to circle and girdle the trunk. It's one of the most common reasons young trees stall out or decline years later, and it's very fixable right now while these are still young.
This video shows why an exposed root flare matters, with examples of what buried and exposed flares look like on real trees.
Can't see the video? Watch it on YouTube.
Digging out the root flares
- Start right at the trunk and work outward about a foot. A strong stream of water from a hose blasts the dirt away fast and doesn't damage the roots the way a shovel can. Follow up with a hand trowel or your fingers.
- Keep going down until you see the trunk flare out and the first big structural roots heading sideways. On nursery trees that went in too deep, this is often 3 to 6 inches below where the soil is now.
- Leave the flare sitting at or just above the surrounding grade. Slope the soil gently away from the trunk so it forms a shallow bowl instead of a hole that holds water against the bark.
- While you're in there, cut away any nursery twine, wire, or burlap, and snip any small roots wrapping around the trunk.
- Don't backfill. Mulch can go around the tree afterward, but hold it a foot back from the trunk.
Restaking them the right way
The single stake tied tight against the center of each trunk needs to come off. That stake is a crutch from the nursery. When the trunk can't move, it never builds the strength and taper it needs to stand on its own, and the tie tends to rub or cut into the bark.
- Drive two stakes, one on each side of the tree, about 12 to 18 inches out from the trunk so they go into firm soil outside the root ball, not through it.
- Line the two stakes up across the direction the wind usually hits that wall, so the tree is braced against it.
- Use soft, flexible ties: rubber tree ties or strips of old bike inner tube work great. Loop each one in a figure eight around the trunk and back to its stake.
- Tie as low on the trunk as you can while still holding the tree upright, usually around a third of the way up. The top should still be able to sway a few inches in the wind. That movement is what builds a strong trunk.
- Check the ties every few months so nothing gets tight, and pull the stakes after about a year once the trees stand on their own.
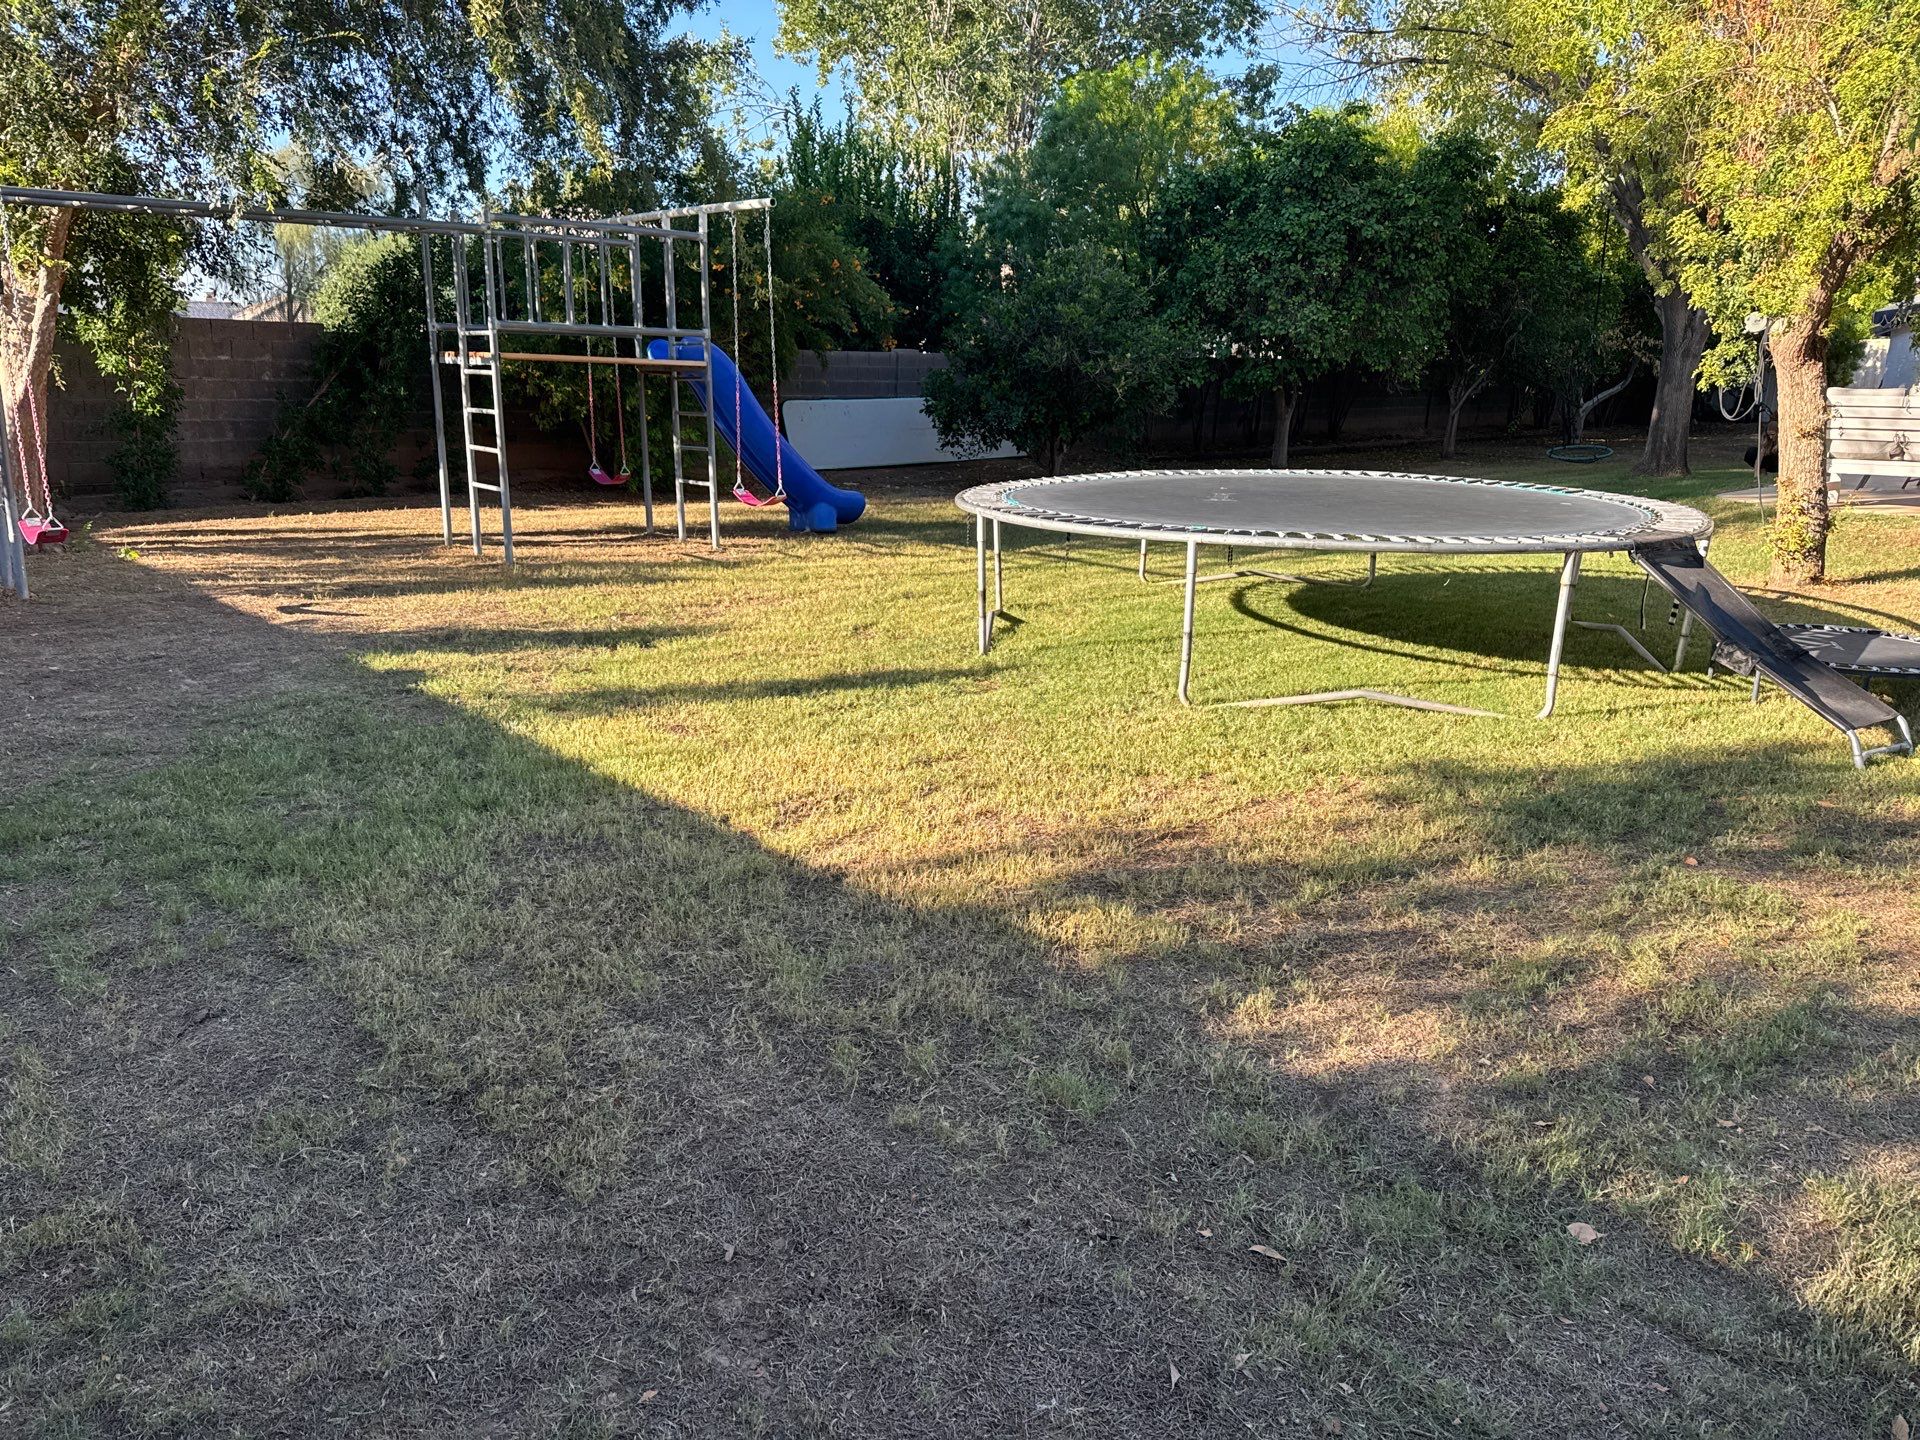
Lawn options: grass types and clover under the citrus
You asked about the different ways to go with the lawn. Here's how the main options stack up in your yard, where part of it gets full sun and part of it sits under and around the citrus.
Bermuda (what most Valley lawns are)
Bermuda is tough in full sun and handles kids and dogs, but it goes brown and dormant in winter and it really struggles in shade. That's why it thins out under the citrus. It also creeps into beds and around tree trunks.
St. Augustine
St. Augustine has a wider, softer blade, stays green longer into the cool season, and handles partial shade far better than Bermuda. It's a great play lawn. It does take more water than Bermuda in summer, and it should be mowed tall, around 3.5 to 4 inches, which keeps the soil shaded and cooler.
The easy way to convert: lay a few rolls of St. Augustine sod in the corners of the yard and let it slowly take over the Bermuda on its own. No tearing out the whole lawn. Skip the winter rye overseeding, because rye competes with the St. Augustine while it's trying to spread. Lay the sod when it's warm, late spring through summer, not now going into winter. Evergreen Turf and West Coast Turf both carry it.
Clover, especially under the citrus
Clover is the one I'd really look at for the area under and around the citrus. It handles shade, stays green and soft, and it pulls nitrogen out of the air and puts it into the soil, which feeds the citrus right along with it. It also does a great job keeping the soil covered and cool.
For type, go with microclover (a smaller-leaf white Dutch clover, sold under names like Pipolina). The leaves stay small, it blends into grass, and it flowers less than regular white Dutch clover, which means fewer bees in a yard where kids are barefoot. Regular white Dutch clover works too if you want more flowers for pollinators.
And now is the time. Fall, October into November, is the best window to seed clover here.
- Mow whatever is there now as short as you can and rake hard to rough up the soil surface. Seed has to touch soil to sprout.
- Spread a thin layer of compost, about a quarter inch, over the area.
- Mix the seed with a few handfuls of sand so you can see where you've spread it, then broadcast it at the rate on the bag. Go over the area in two directions for even coverage.
- Lightly rake it in and walk on it or roll it so the seed is pressed into the compost.
- Keep the top of the soil damp with short, light waterings once or twice a day until it sprouts, usually 7 to 10 days, then taper over the next few weeks to deeper, less frequent watering.
Skip any weed and feed product on the lawn. The weed killer in those takes out clover along with the weeds. Clover can thin a bit in the worst of the summer heat; a light reseed each fall keeps it full.
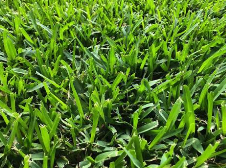
St. Augustine
Wide, soft blade, handles partial shade much better than Bermuda. Convert by laying a few rolls in the corners and letting it spread.
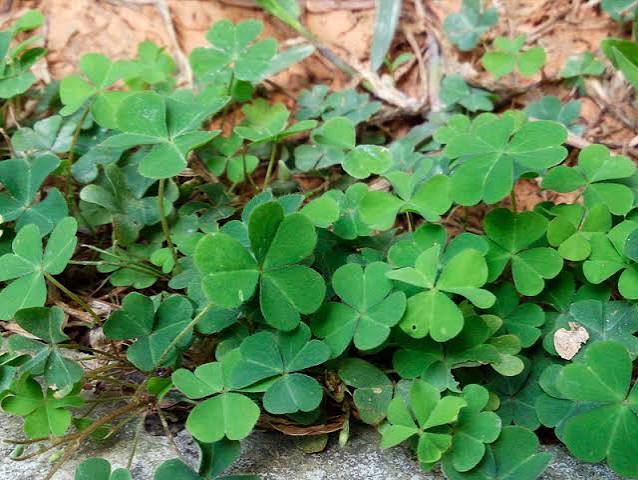
Microclover
Shade tolerant, stays green, feeds the soil with nitrogen. Best choice for under and around the citrus. Seed now through November.
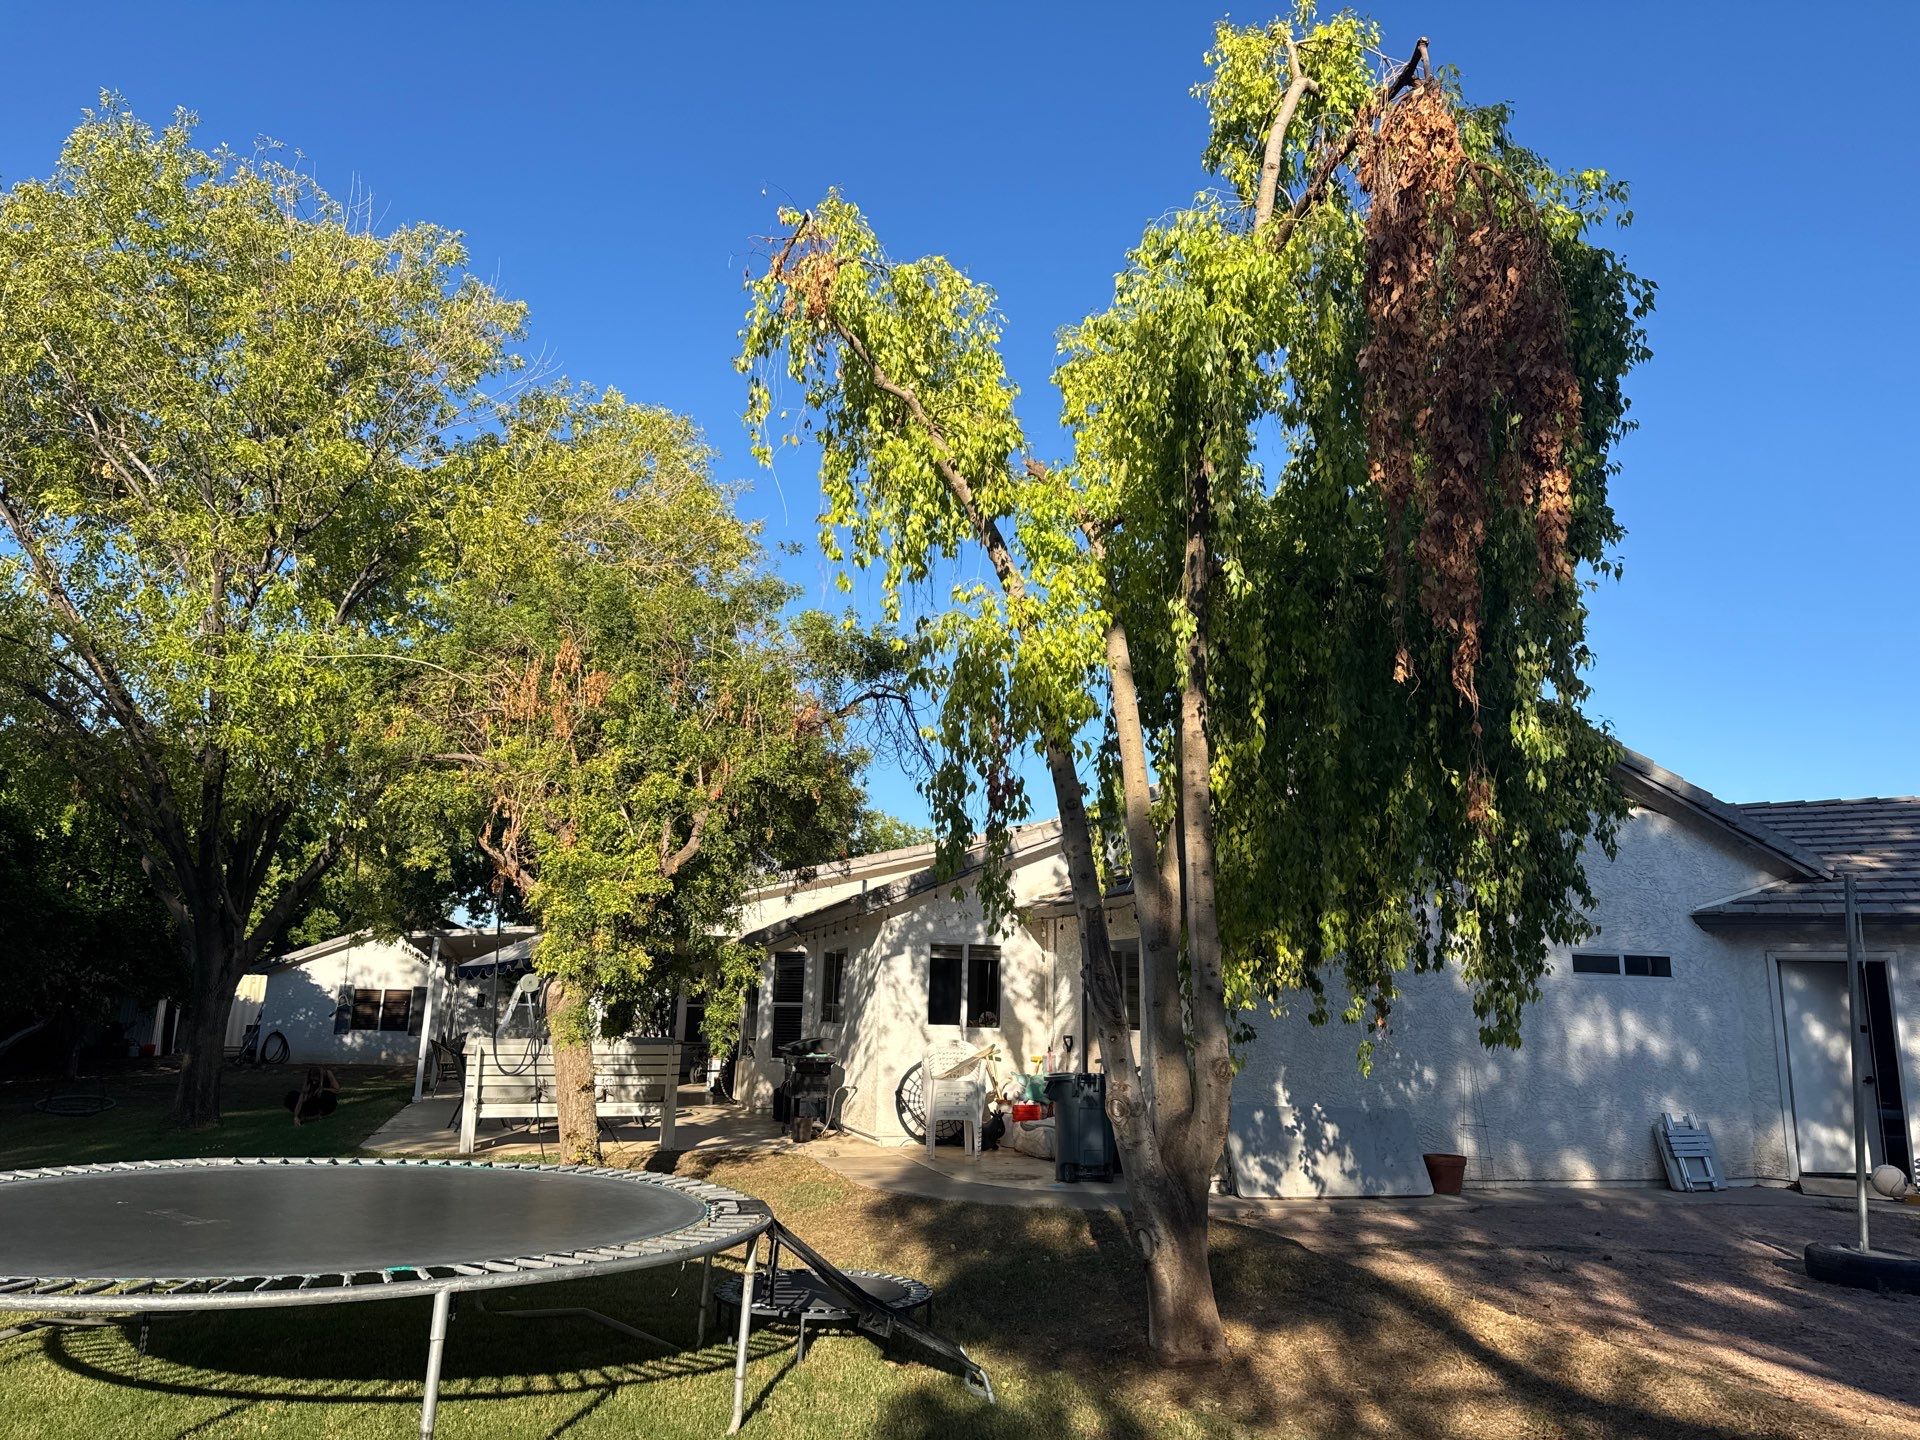
Trees that are still recovering
These trees aren't in great shape yet. They're in recovery mode, and what they need most right now is deep water that actually reaches the roots, plus food for the soil life that keeps those roots healthy.
The deep soak
- Set a hose on a slow trickle, just a little more than a drip, at one spot under the outer edge of the canopy.
- Leave it there for a full day, around 24 hours. That slow soak pushes water 2 to 3 feet down, where the deeper roots are.
- Do one tree at a time, and next round put the hose on a different side of the tree so the whole root zone gets soaked over time.
- Through the cooler months, a deep soak about once a month on top of the regular irrigation is plenty. Next summer they'll want it more often.
For a stressed tree, the goal is building the soil biology around the roots, not pushing a burst of new growth that the roots can't support yet. Skip the high nitrogen synthetic stuff here.
Feeding: everything you need to do it yourself
Here's the exact approach I use, so you can do this yourself on these trees. Feeding is really about feeding the soil life. Fungi, bacteria, and worms break down organic matter and hand nutrients to the roots, which is what keeps plants strong without synthetic fertilizers.
- Compost, and be generous. On trees, spread it in a wide ring around the drip line, the outer edge of the canopy where most of the feeder roots are, from about halfway in to a couple feet past the edge. On shrubs, put it closer in, from a few inches off the stems out about a foot past the edge of the plant. Go 1 to 2 inches deep, and if you're unsure, go thicker rather than thinner. You really can't overdo quality compost. Do this three times a year: late winter (February), early summer (May), and fall (October).
- Worm castings every quarter. Every three months, scatter worm castings over the same areas: a few cups around each shrub and a couple pounds around the drip line of each tree. Castings are loaded with beneficial microbes that bring the soil to life. When it lines up with a compost round, put the castings down first and the compost right over them.
- A good organic fertilizer high in fulvic acid. Look for an organic fertilizer that lists fulvic acid on the label. Fulvic acid helps roots take up nutrients, including the iron and other micronutrients that cause yellow leaves when they're missing, and it feeds the soil life too. Apply it at the label rate on the schedule it gives. Liquid versions can go on monthly with a watering can or hose end sprayer.
- Water it all in. Give everything a deep watering right after you put it down so it soaks into the root zone.
- Mulch over the top. Mulch goes over the compost to keep it moist and cool so the soil life can do its work. Hold it a foot back from trunks and stems. No need to work any of it into the soil.
Compost, worm castings, and mulch are all at Arizona Worm Farm. If you'd rather not do it yourself, our monthly fertilizing program handles all of this for you. Details are in the Soil and Feeding section below.
For trees that are really hanging on, there's also our Tree Recovery Program: four quarterly visits a year with deep root liquid injections plus compost and chicken manure feedings. It runs $550 per tree per year, with discounts for each additional tree.
Hold off on any heavy pruning on these until they bounce back. Take out what's clearly dead, but leave the green. Every leaf is making food for the tree right now.
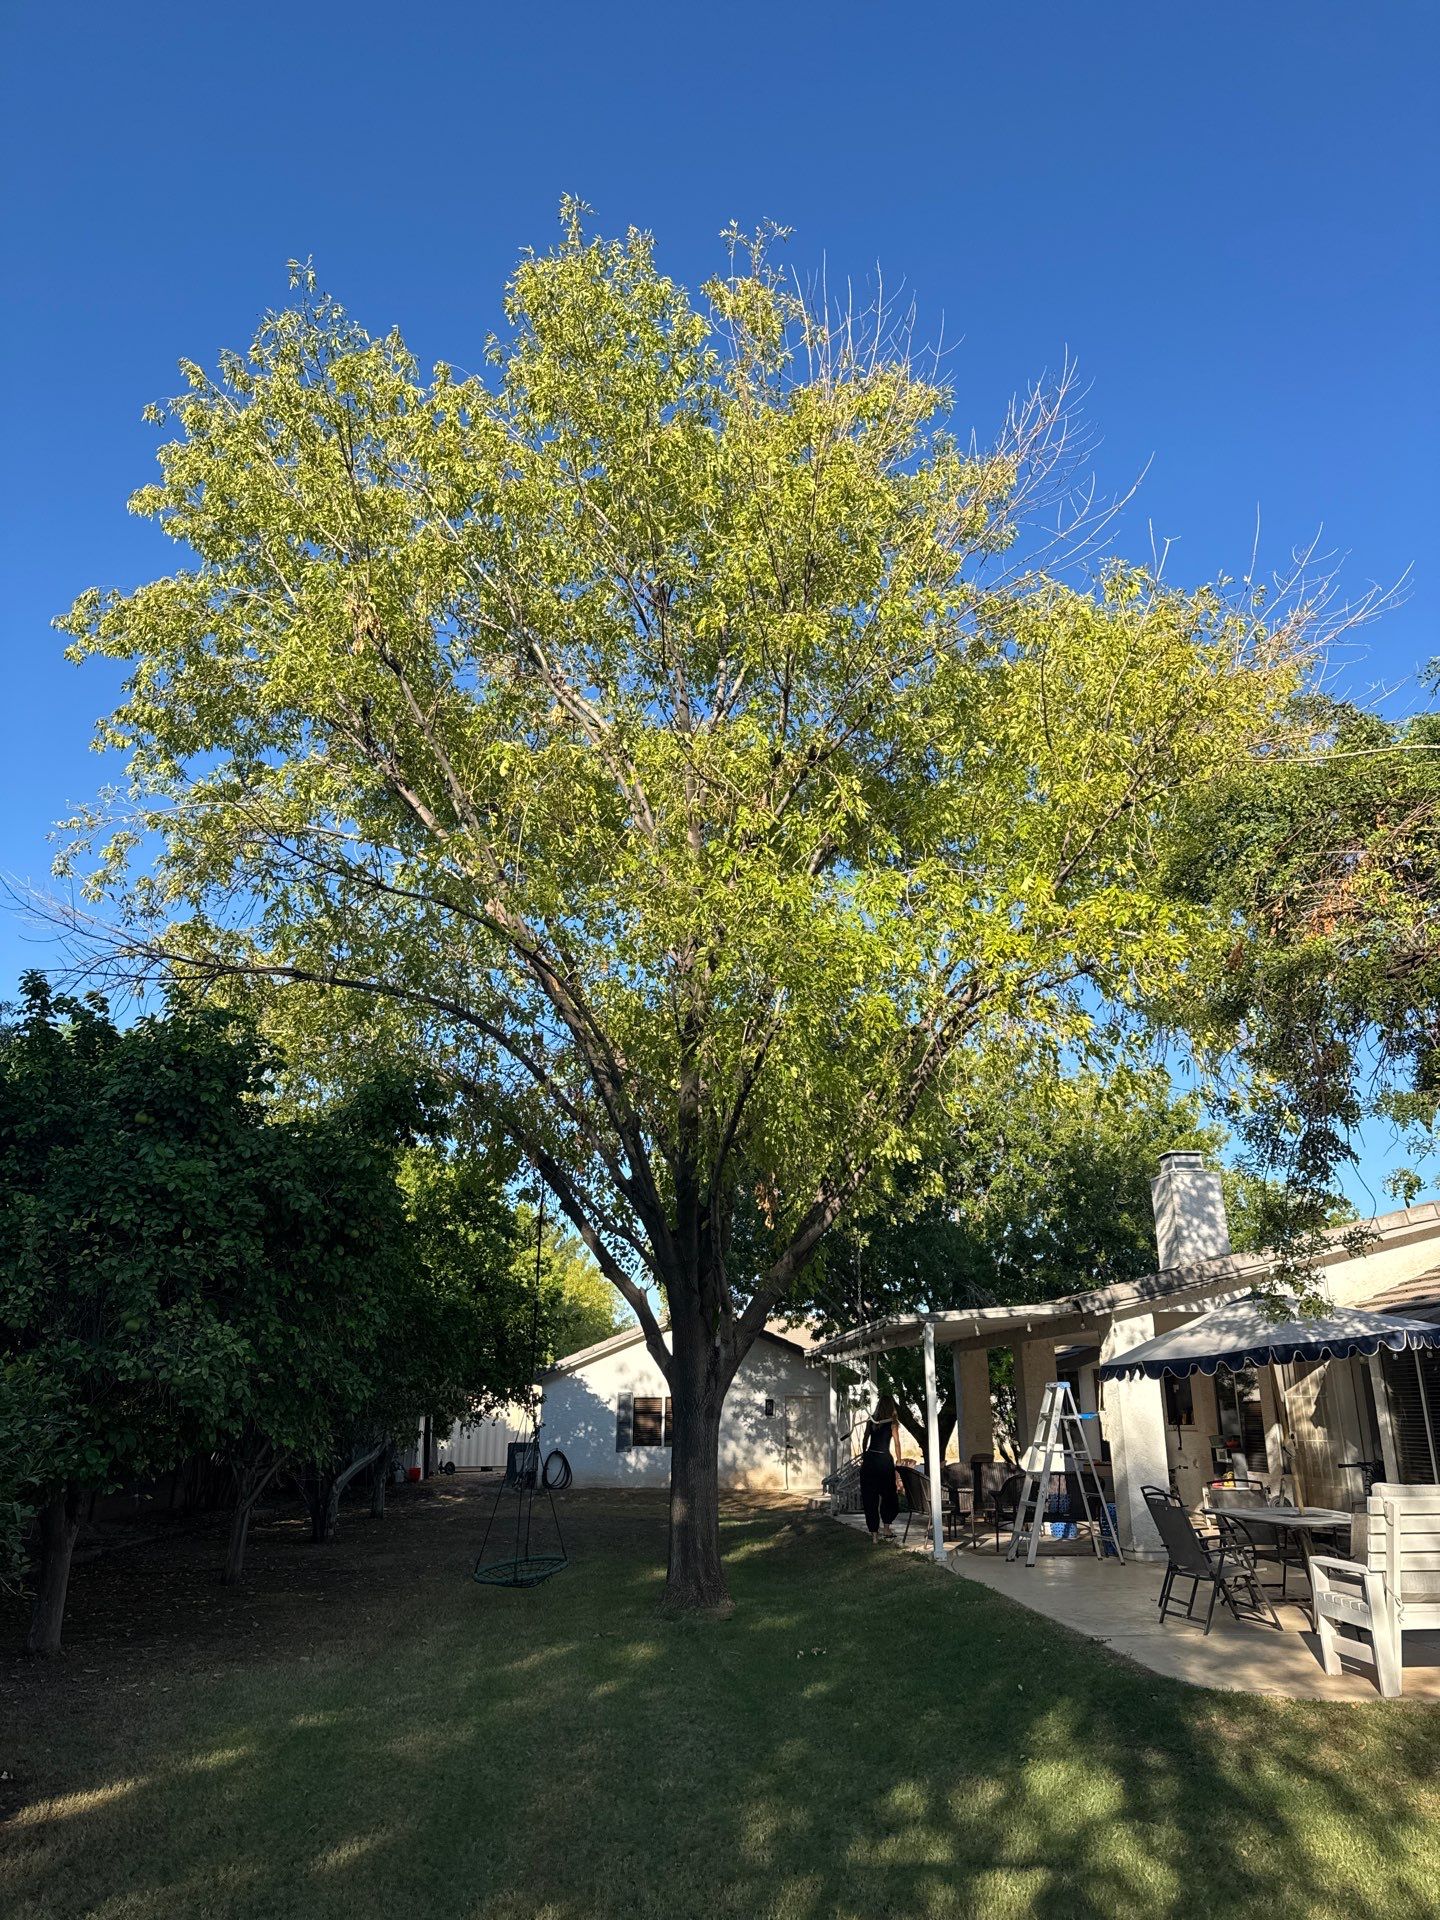
Ash tree: a good pruning from a certified arborist
This ash has a lot of long, leggy branches with most of their weight sitting way out at the tips. That's the setup for limbs snapping in a monsoon storm, and this one is right by the patio. It needs a proper structural pruning from a certified arborist.
I recommend King's Tree Service. They'll shorten those long limbs back to strong side branches, thin out crossing and crowded branches, and keep the canopy balanced so you still have your shade.
- Timing: now through winter is a great window, while the tree is slowing down and before the spring flush.
- What to avoid: topping, and "lion tailing," where all the inside branches get stripped and only tufts at the ends are left. Both make the weight problem worse.
- How much: a good arborist won't take more than about a quarter of the canopy in one visit.
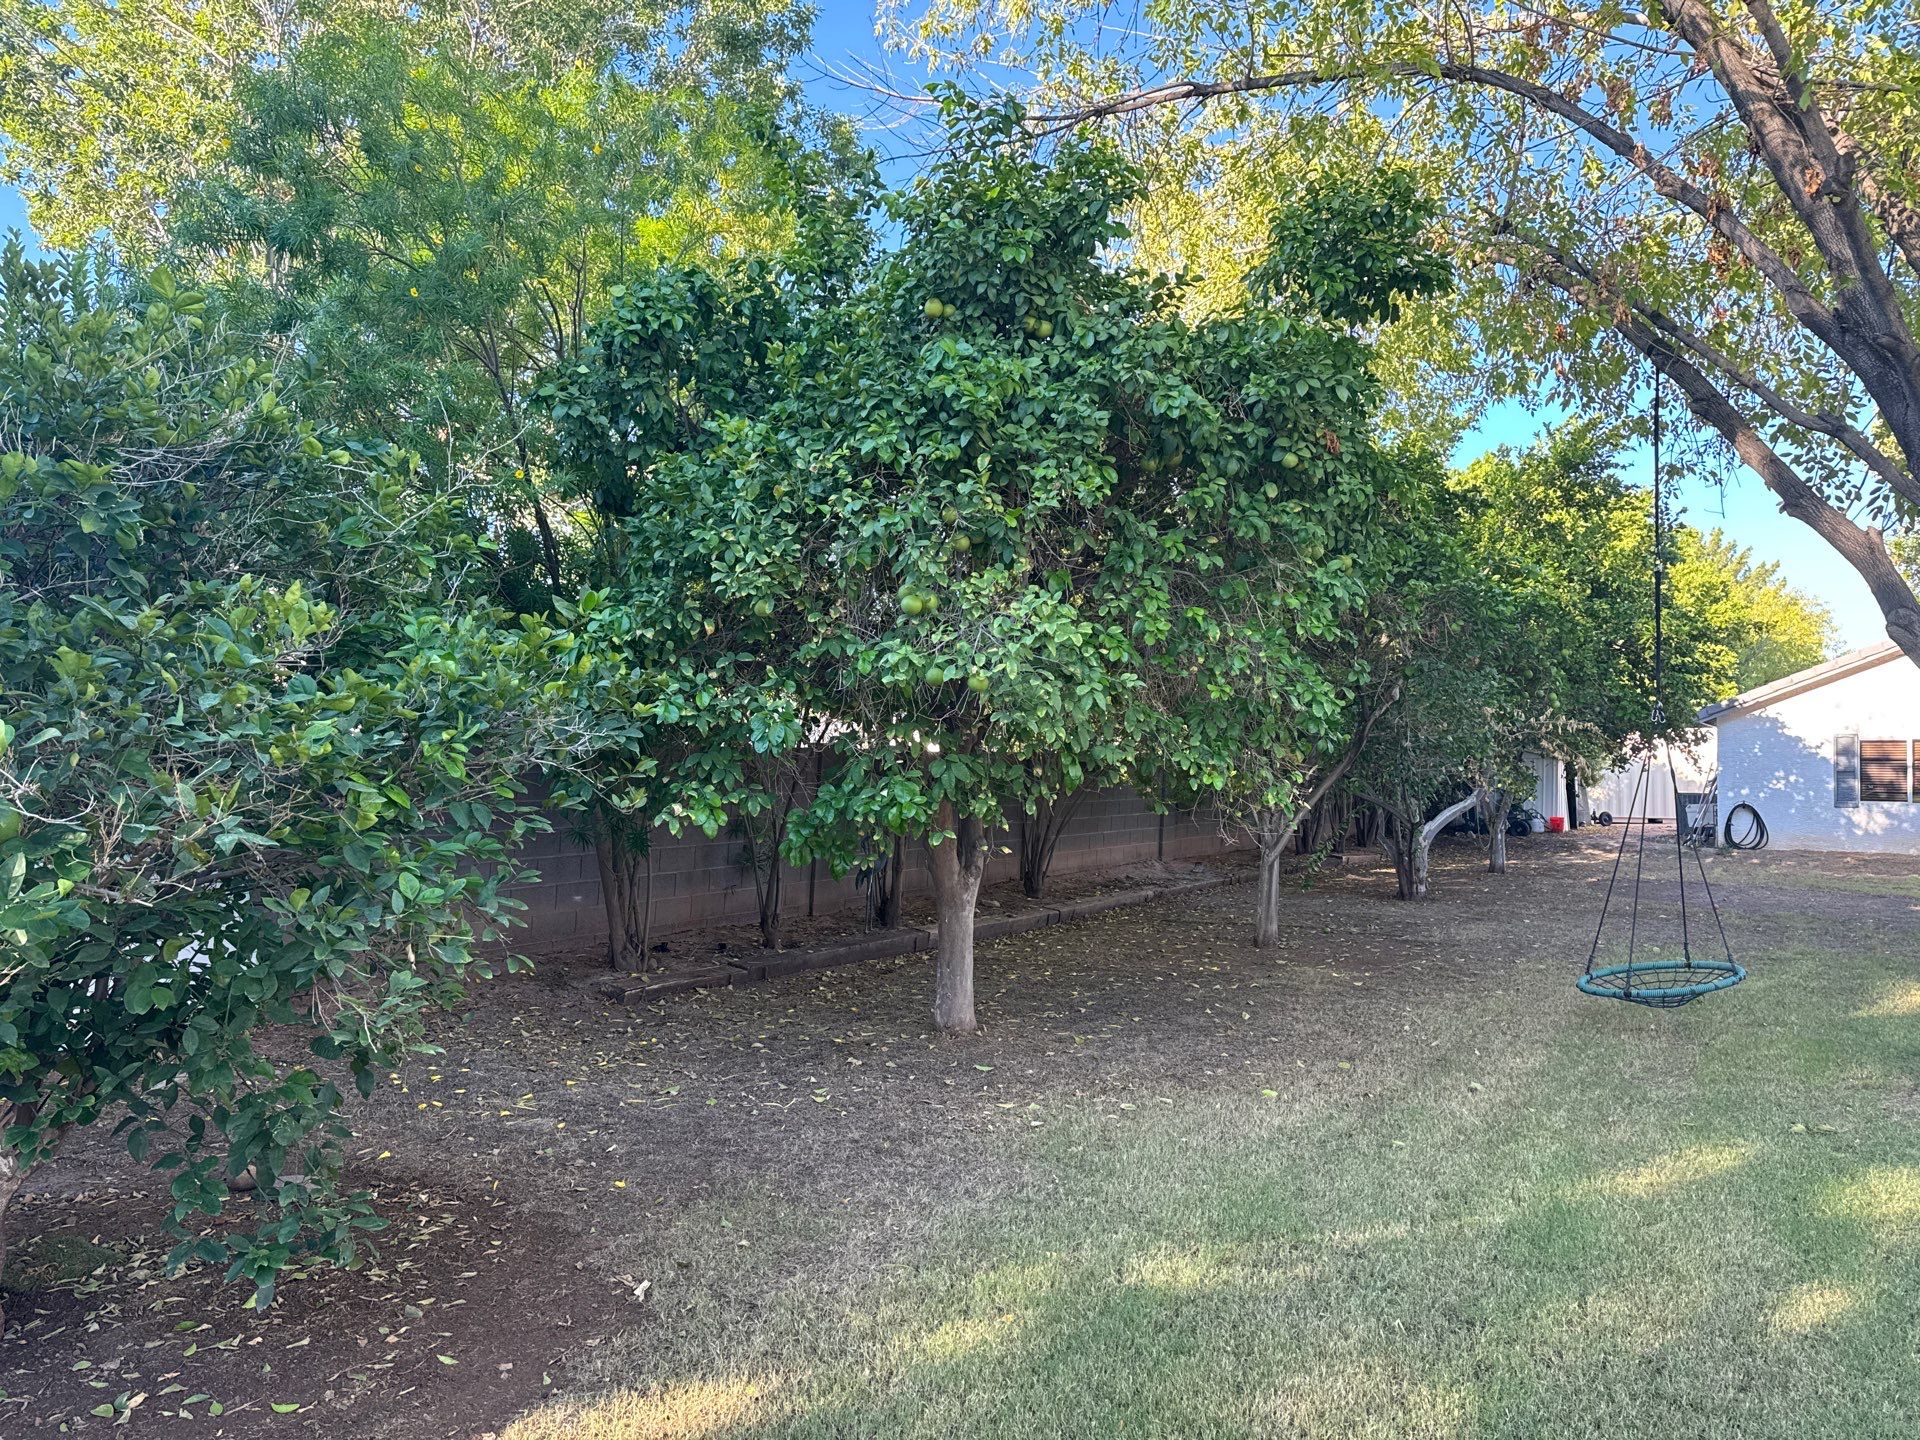
Citrus: clean out the dead wood, then feed
The big thing these citrus need is a good cleanout of all the dead wood inside the canopy. Dead twigs and branches are a home for pests and fungus, they block air flow through the tree, and they make it harder to see what's actually going on inside. Now is a good time to do it.
Getting the ash tree thinned out by the arborist will help these too. Opening up that canopy lets more sun reach the citrus, and citrus need full sun to stay dense, healthy, and fruiting well.
How to clean them out
- Dead wood is easy to spot: gray, brittle, no leaves, and it snaps instead of bending. If you're unsure, scratch the bark with your thumbnail. Green underneath means it's alive.
- Use clean, sharp bypass pruners for small stuff and loppers or a pruning saw for anything thicker than your thumb.
- Cut back to live wood or to the collar where the branch meets a bigger one. Don't leave stubs.
- Wipe your tools with rubbing alcohol between trees so nothing spreads.
- Only take the dead. Leave the green growth and the low hanging skirts. Citrus bark sunburns easily, and those leaves are the shade for the trunk.
Feeding: everything you need to do it yourself
Here's the exact approach I use, so you can do this yourself on the citrus. Feeding is really about feeding the soil life. Fungi, bacteria, and worms break down organic matter and hand nutrients to the roots, which is what keeps plants strong without synthetic fertilizers.
- Compost, and be generous. On trees, spread it in a wide ring around the drip line, the outer edge of the canopy where most of the feeder roots are, from about halfway in to a couple feet past the edge. On shrubs, put it closer in, from a few inches off the stems out about a foot past the edge of the plant. Go 1 to 2 inches deep, and if you're unsure, go thicker rather than thinner. You really can't overdo quality compost. Do this three times a year: late winter (February), early summer (May), and fall (October).
- Worm castings every quarter. Every three months, scatter worm castings over the same areas: a few cups around each shrub and a couple pounds around the drip line of each tree. Castings are loaded with beneficial microbes that bring the soil to life. When it lines up with a compost round, put the castings down first and the compost right over them.
- A good organic fertilizer high in fulvic acid. Look for an organic fertilizer that lists fulvic acid on the label. Fulvic acid helps roots take up nutrients, including the iron and other micronutrients that cause yellow leaves when they're missing, and it feeds the soil life too. Apply it at the label rate on the schedule it gives. Liquid versions can go on monthly with a watering can or hose end sprayer.
- Water it all in. Give everything a deep watering right after you put it down so it soaks into the root zone.
- Mulch over the top. Mulch goes over the compost to keep it moist and cool so the soil life can do its work. Hold it a foot back from trunks and stems. No need to work any of it into the soil.
Compost, worm castings, and mulch are all at Arizona Worm Farm. If you'd rather not do it yourself, our monthly fertilizing program handles all of this for you. Details are in the Soil and Feeding section below.
Citrus roots spread well past the canopy, so on these, feed wide. Take the compost ring a few feet past the drip line.
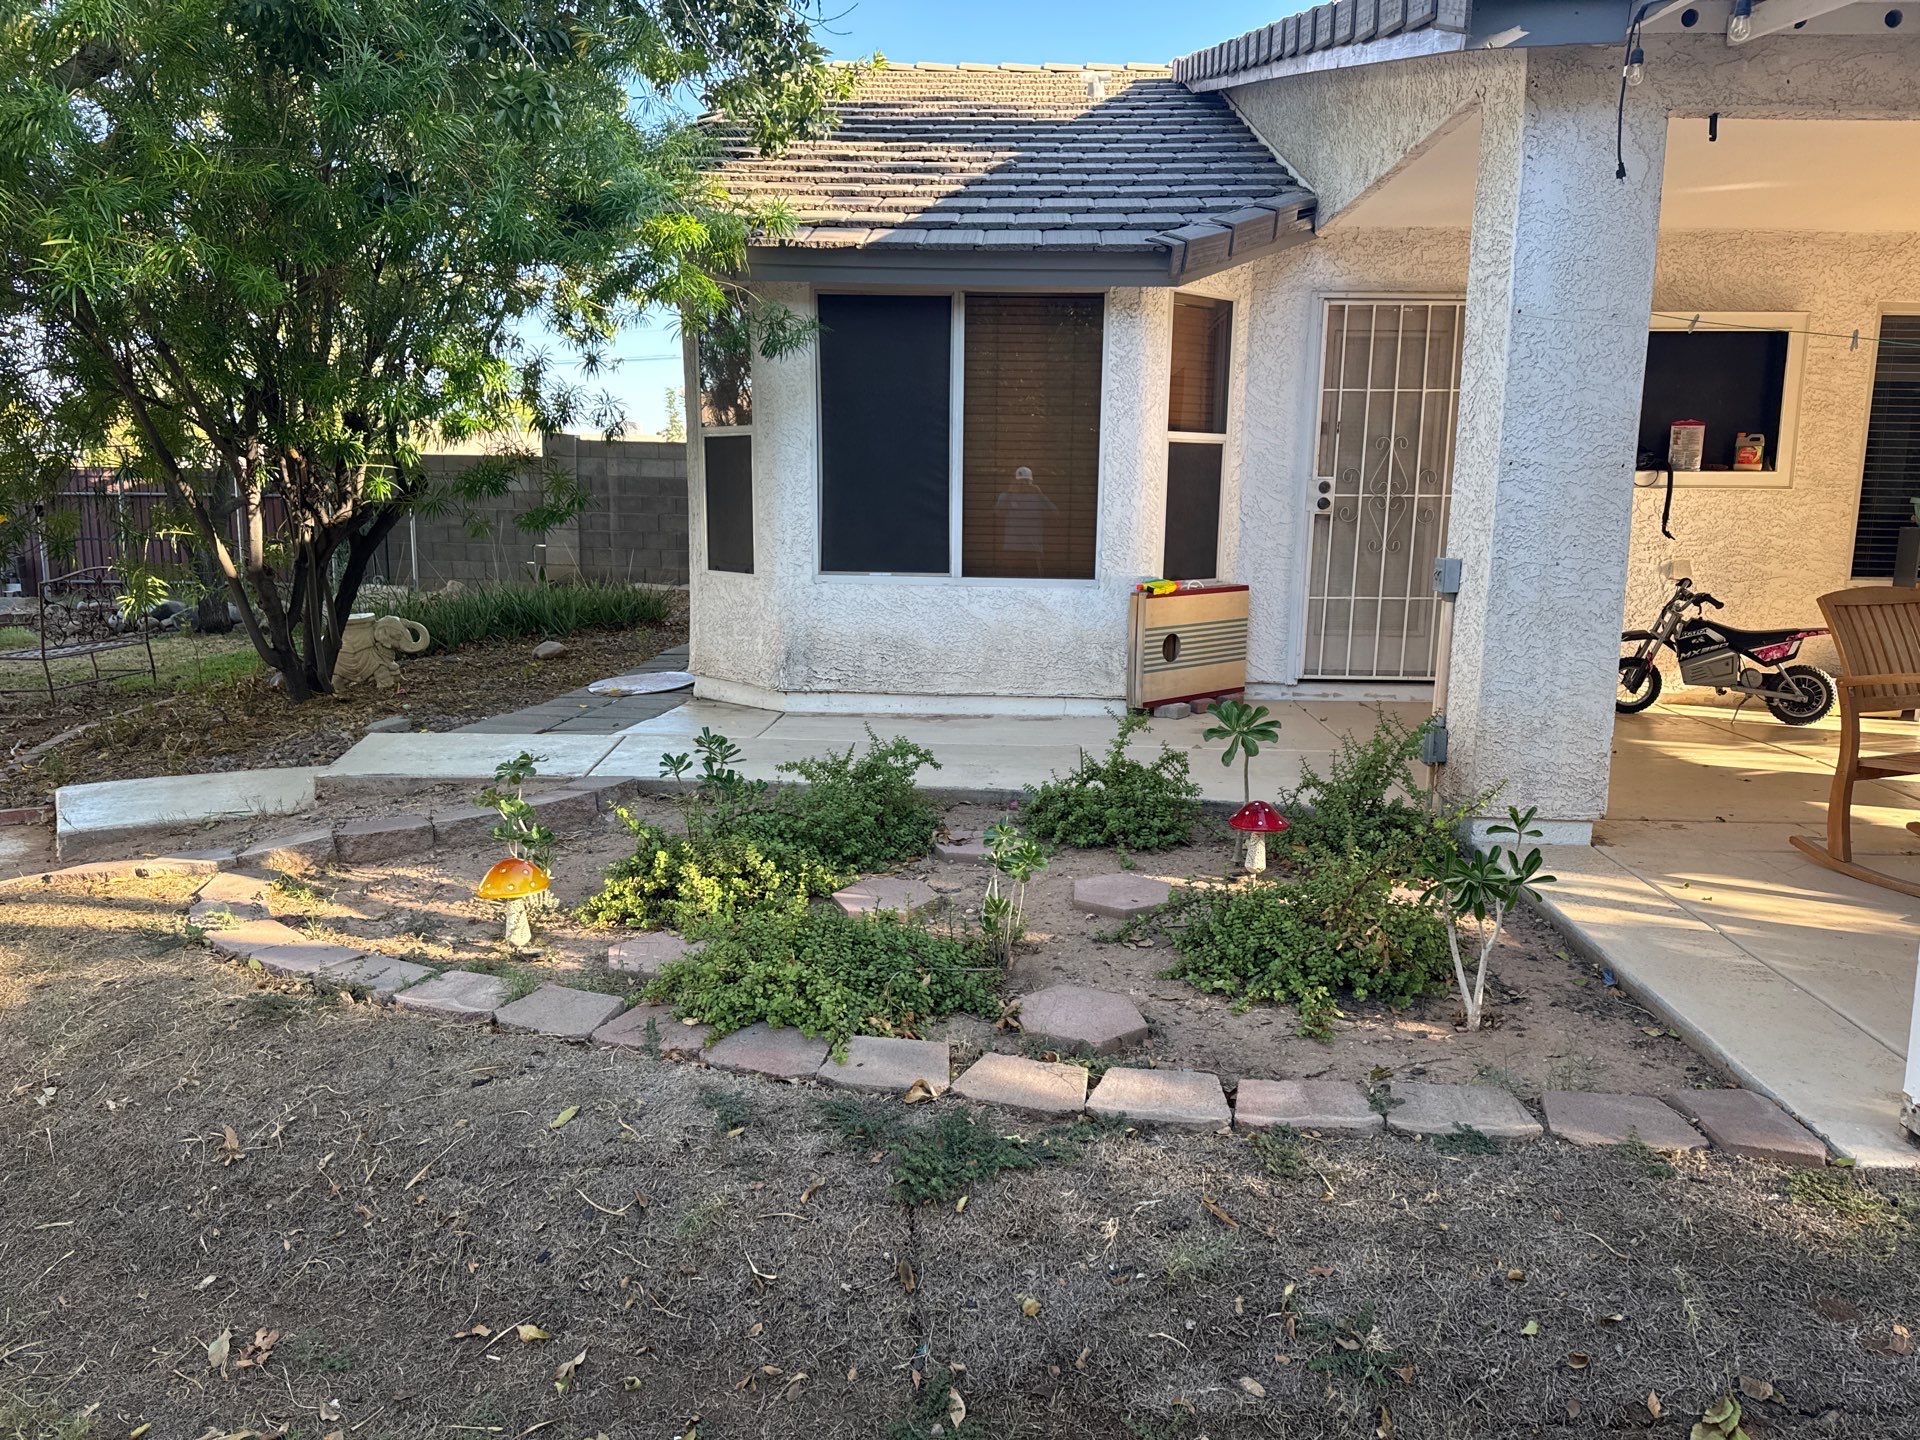
Small garden area: wood chips and more elephant food
For this small garden area, putting down wood chips and letting the elephant food fill in more would be great.
Wood chips hold moisture, keep the soil cool, and break down into the kind of fungal rich soil that roots love. Elephant food roots easily anywhere a stem touches soft, moist ground, so the chips will speed up the fill in a lot.
Wood chips
- Spread them 1 to 2 inches deep. That's all this area needs. Keep them a few inches back from the house foundation and off the stems of the plants.
- Arborist chips are the best kind: a mix of wood and leaves. You can often get them free through ChipDrop, or pick up mulch at Arizona Worm Farm.
Propagating the elephant food
- Snip 4 to 6 inch pieces from the existing plants. Take them from spots where it's full so you don't leave holes.
- Set the cuttings somewhere shady for 2 to 5 days so the cut end dries and seals over.
- Push them 1 to 2 inches into the soil where you want it to fill in, right through the wood chips into the soil underneath.
- Water lightly and keep the soil just barely moist for 3 to 4 weeks until they root. Fall is a perfect time for this.
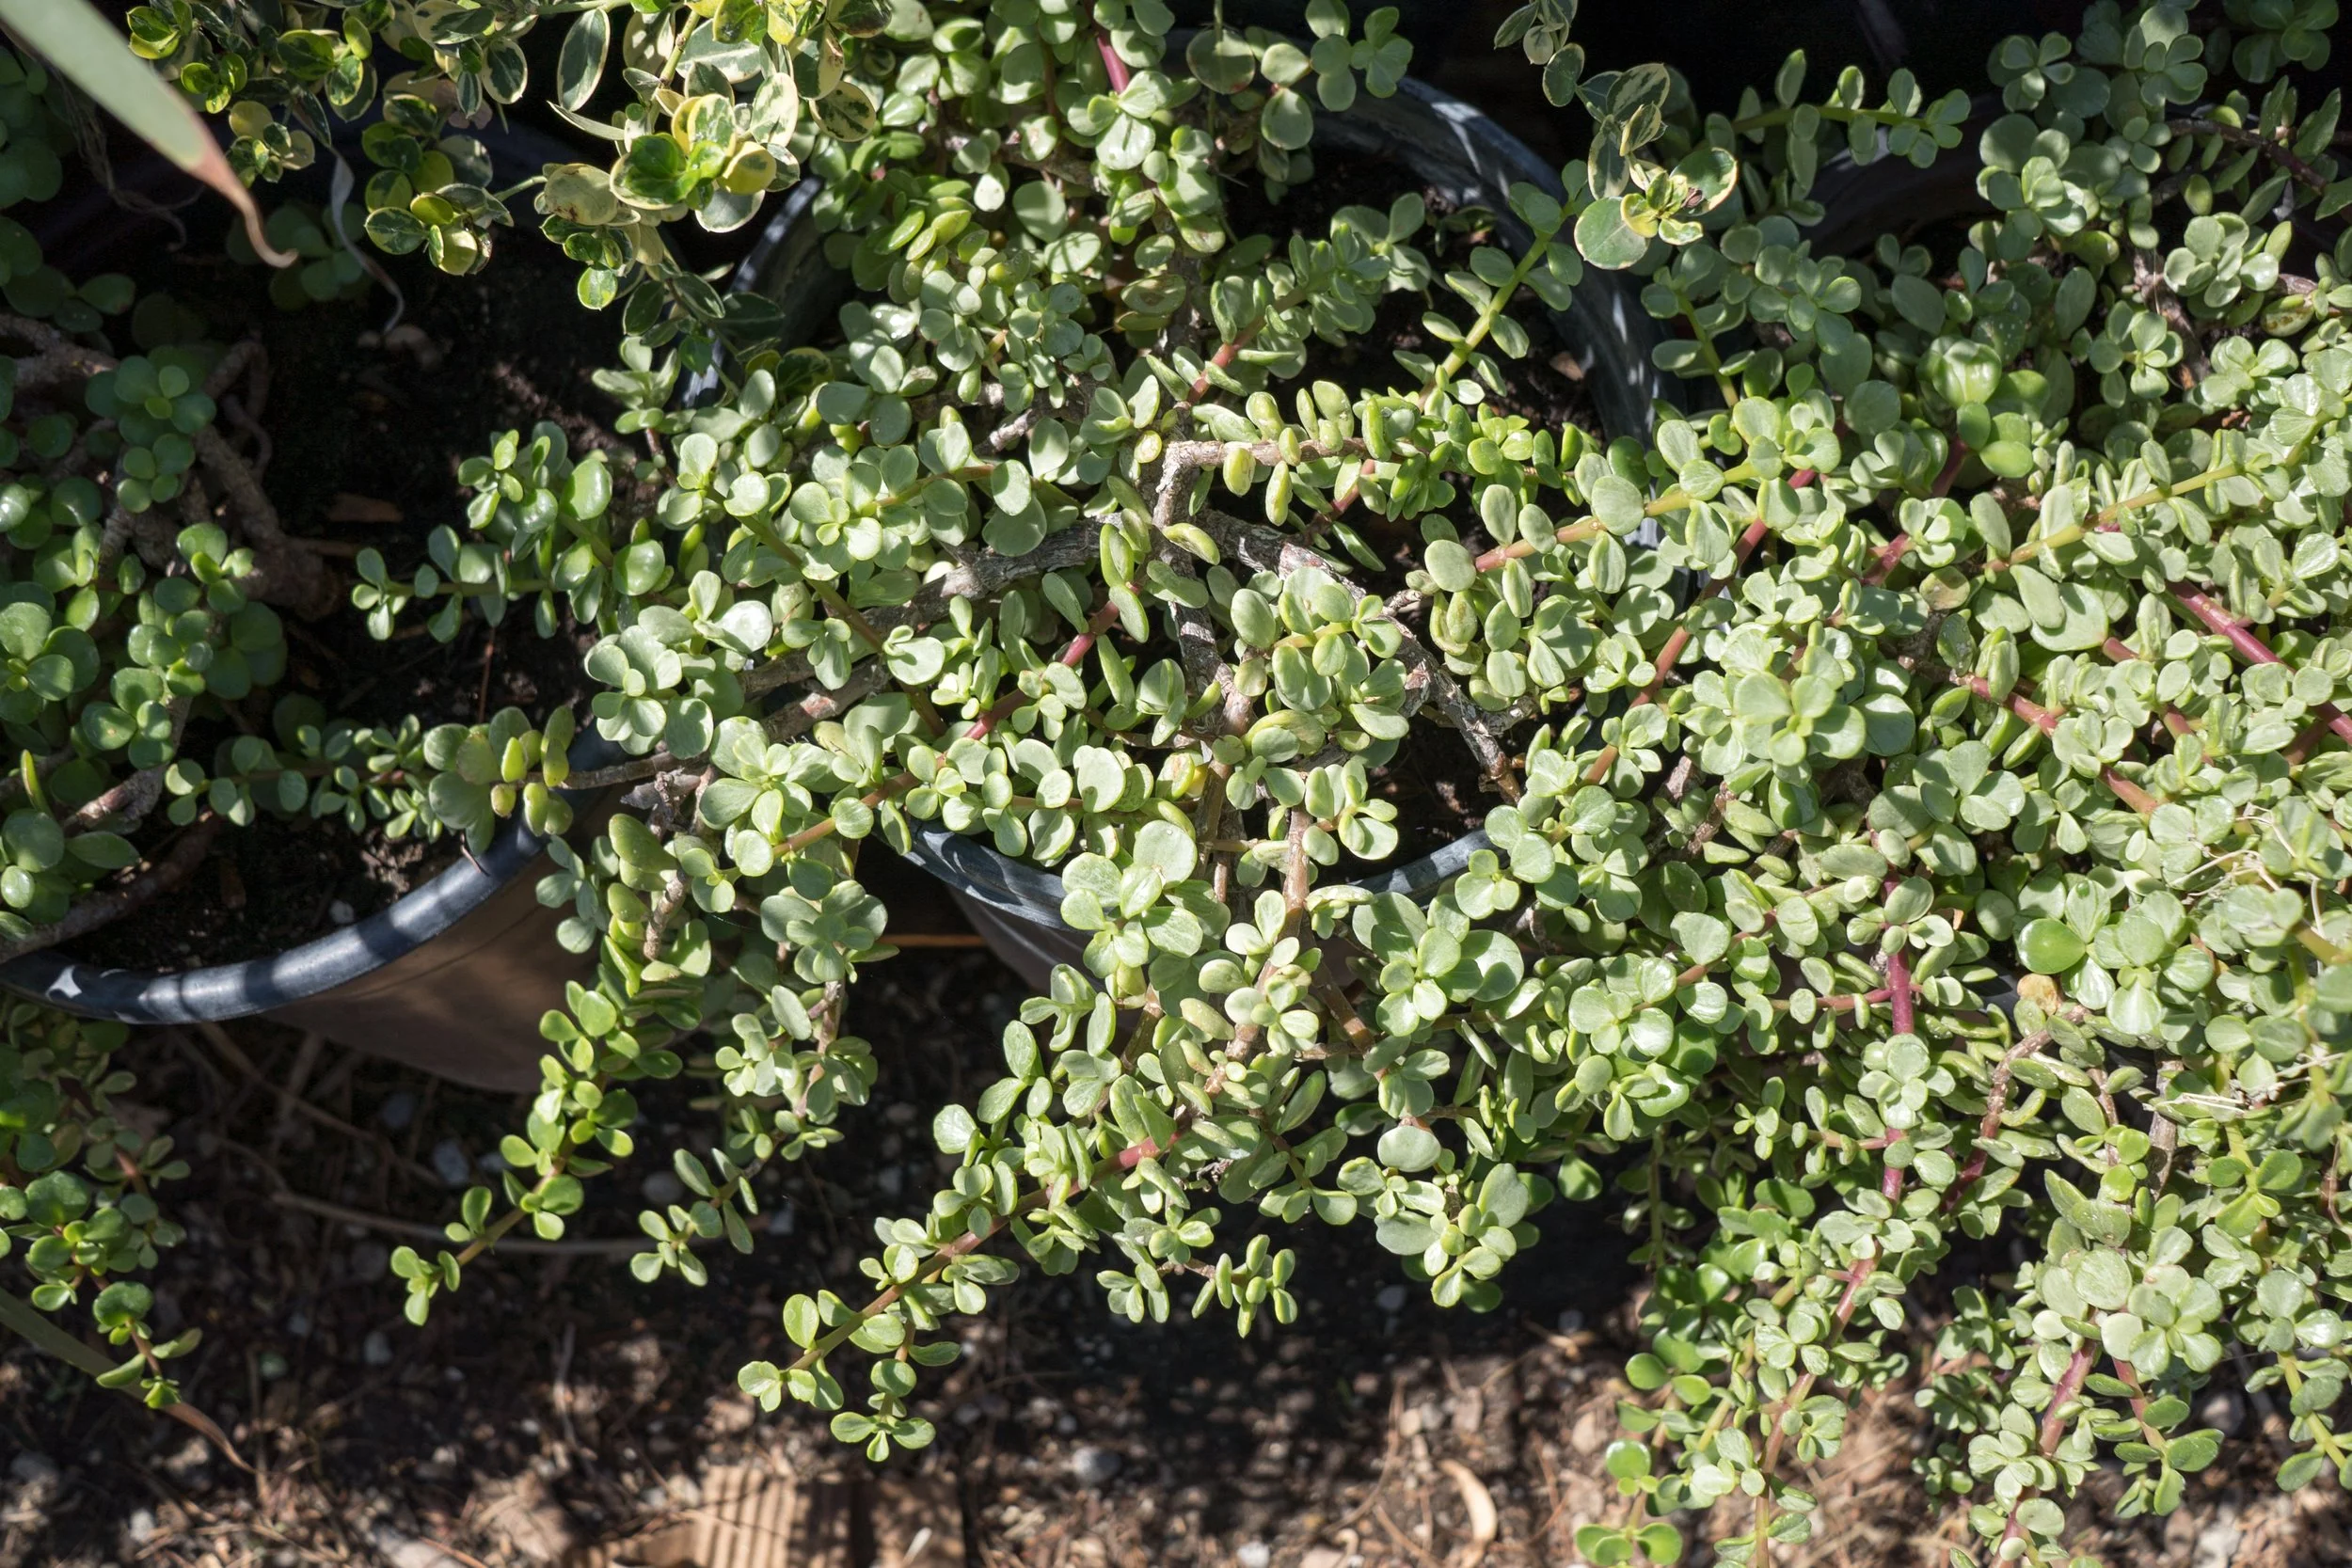
Elephant Food
Thick, round succulent leaves, takes less water than plants that aren't desert adapted, and roots from cuttings with almost no effort. Fills in fast once it gets going.
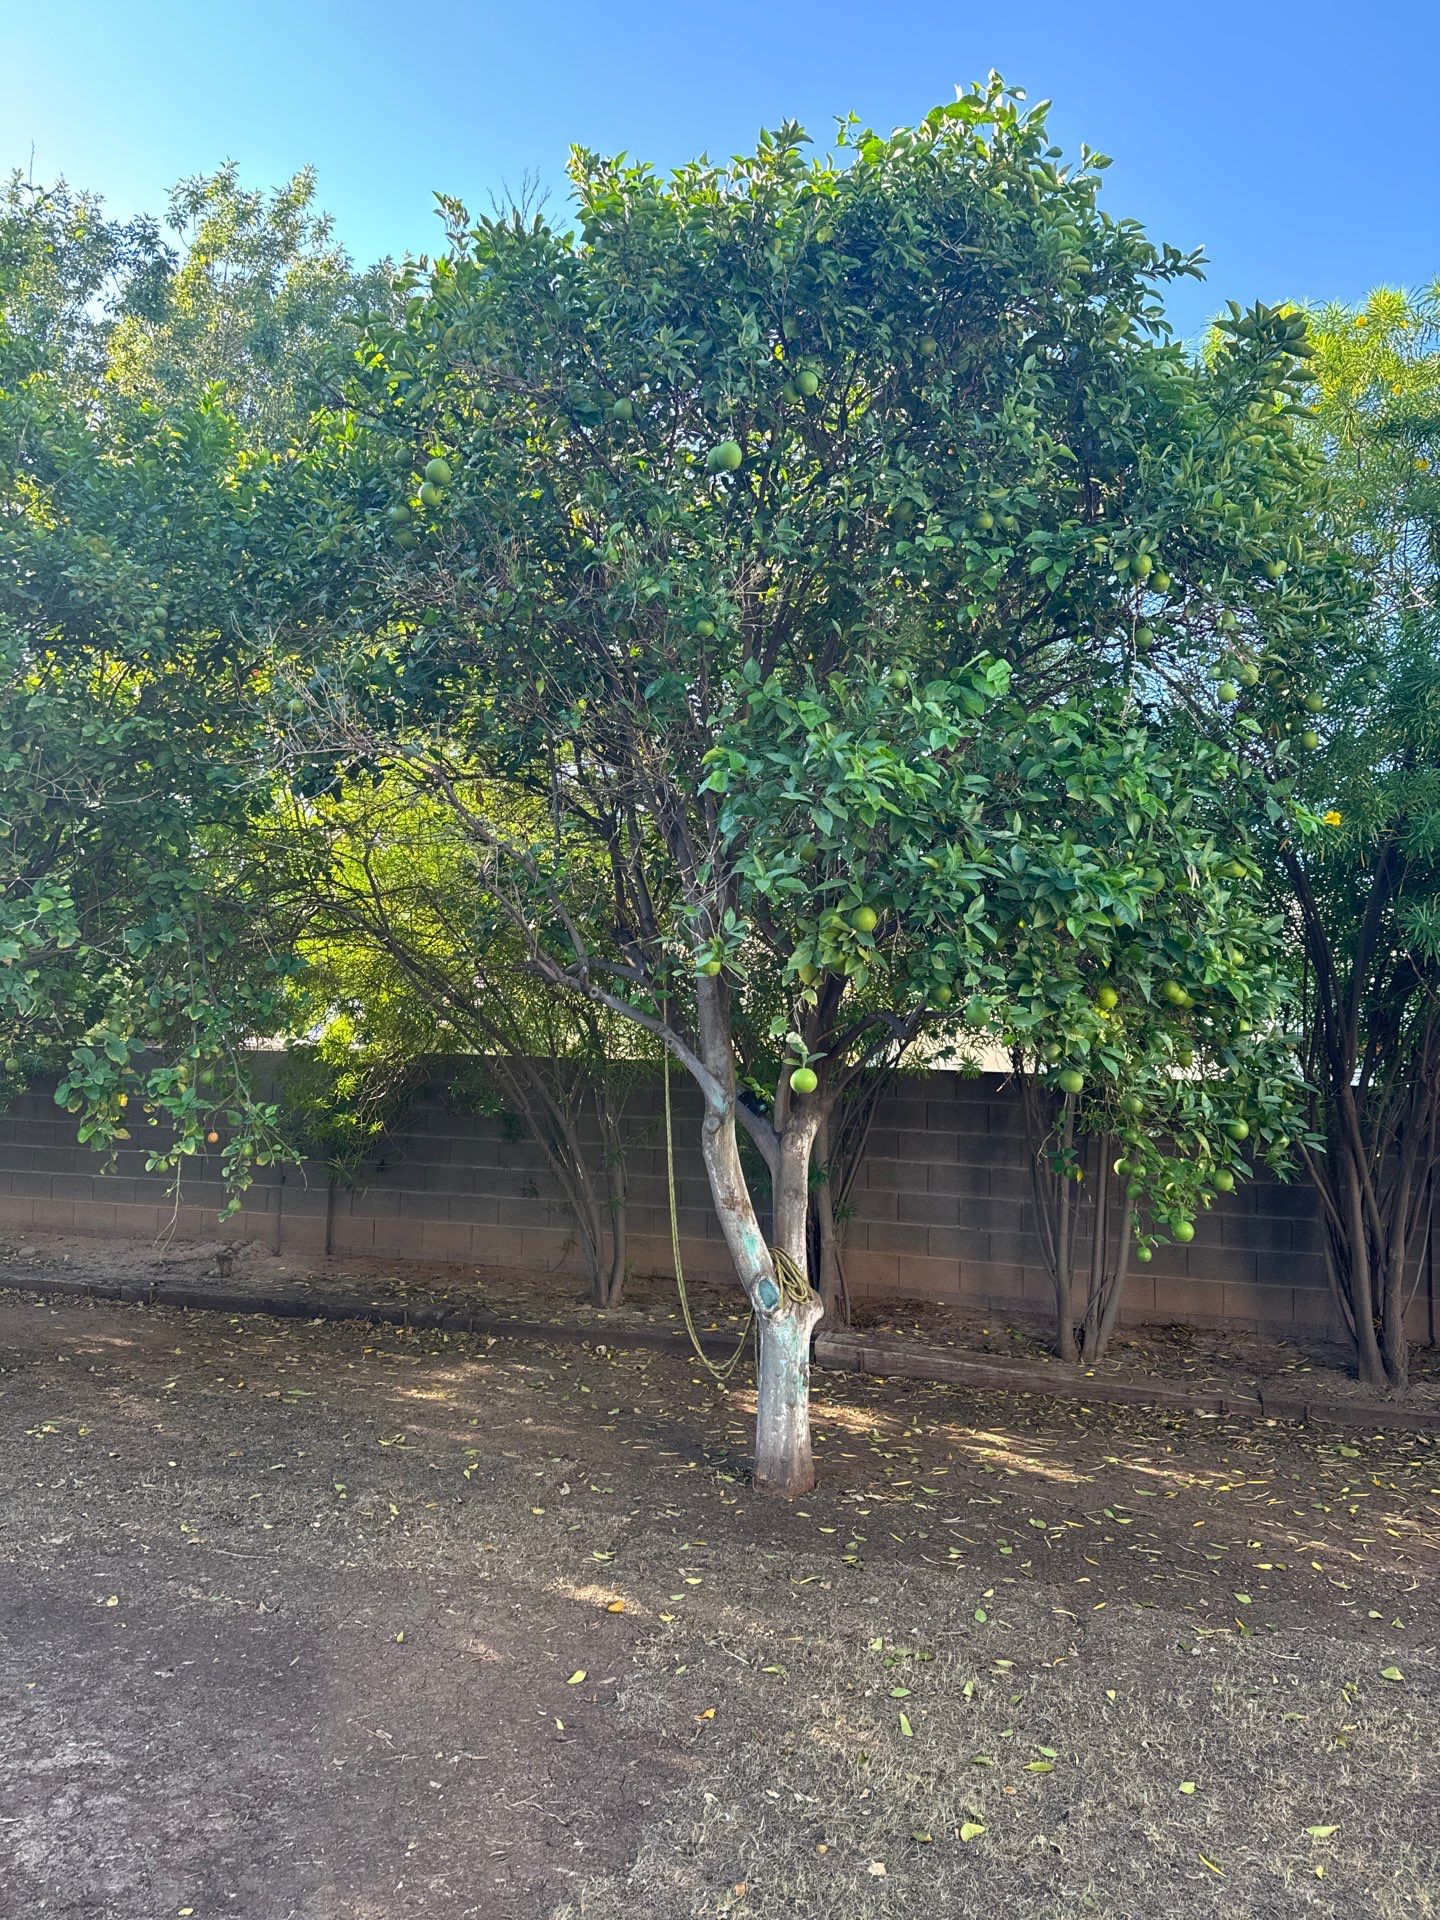
The tree you're thinking of removing
If you decide to take this tree out, now is the time. Doing it in the fall gives the lemon tree next to it the whole cool season to fill into that space, push new growth in spring, and let that growth harden off before summer hits.
- Grind the stump, don't dig it. The roots of the two trees are likely mixed together. Digging out a root ball would tear up the lemon's roots. Cutting low and grinding the stump leaves them alone.
- Watch for sunburn. Branches and trunk on the lemon that have been shaded by this tree will suddenly get full sun. Paint any newly exposed bark with a 50/50 mix of white interior latex paint and water, or a citrus whitewash.
- Go easy on the lemon. Don't prune it hard to "shape it" into the gap. Let it grow into the space on its own and just keep up the compost and mulch underneath.
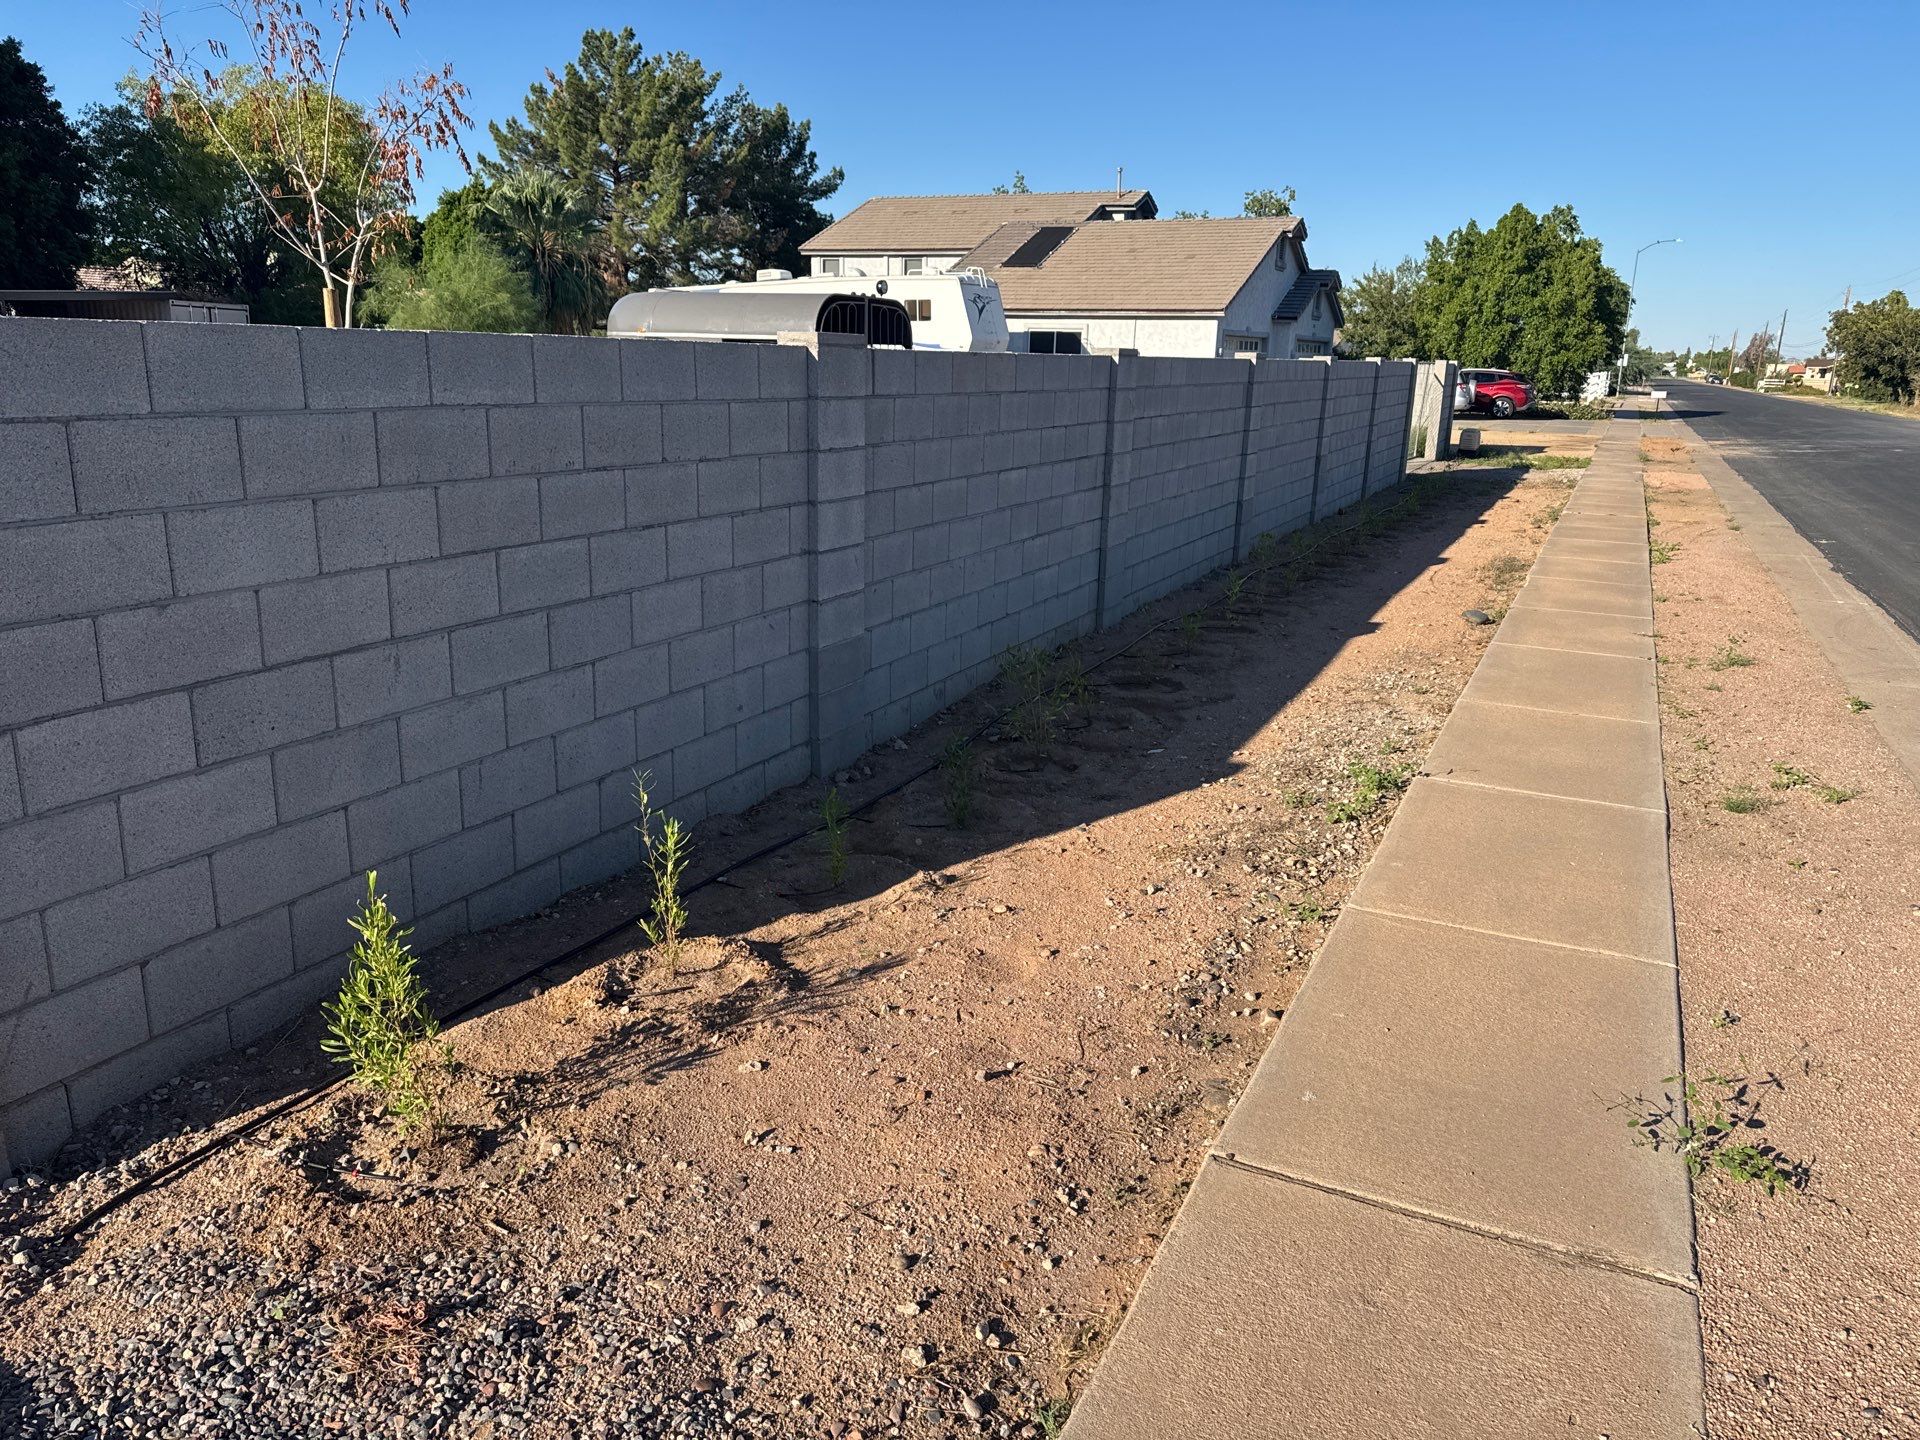
Hopseed along the wall: watering, mulch and ground covers
These hopseed look awesome. They're settling in well.
Watering
Start stretching out the time between waterings as it cools off through October and November, keeping each watering long and deep. By December, you can be down to one deep water a week, enough to wet the soil 18 to 24 inches down.
Mulch, and cardboard if you want to stop the weeds
Mulch would really help here. It keeps the soil cool and moist and feeds the soil as it breaks down. If you really want to suppress the weeds, put down cardboard first.
- Pull the weeds that are there now.
- Lay two layers of plain brown cardboard, tape and labels removed, overlapping the edges 6 inches so weeds can't sneak through the seams.
- Soak the cardboard with the hose.
- Cover it with 3 to 4 inches of mulch.
- Leave a ring around each hopseed open, and keep the mulch a foot back from the trunks. If you plant ground covers, cut an X in the cardboard and plant right through it.
Ground covers for in front of the hopseed
Ground covers in front of the hedge will shade and cool that strip of soil and look great along the sidewalk. Plant them about 3 feet out from the hopseed so the hedge has room to fill in, and about a foot back from the sidewalk. These are all desert adapted and take full sun and reflected heat off the wall and concrete.

Yellow Dot
Fast, bright green mat with little yellow daisy flowers most of the year. Covers ground quickly and cools the soil underneath it. Takes a bit more water than the others on this list, so it does best where it gets some afternoon relief or steady drip.
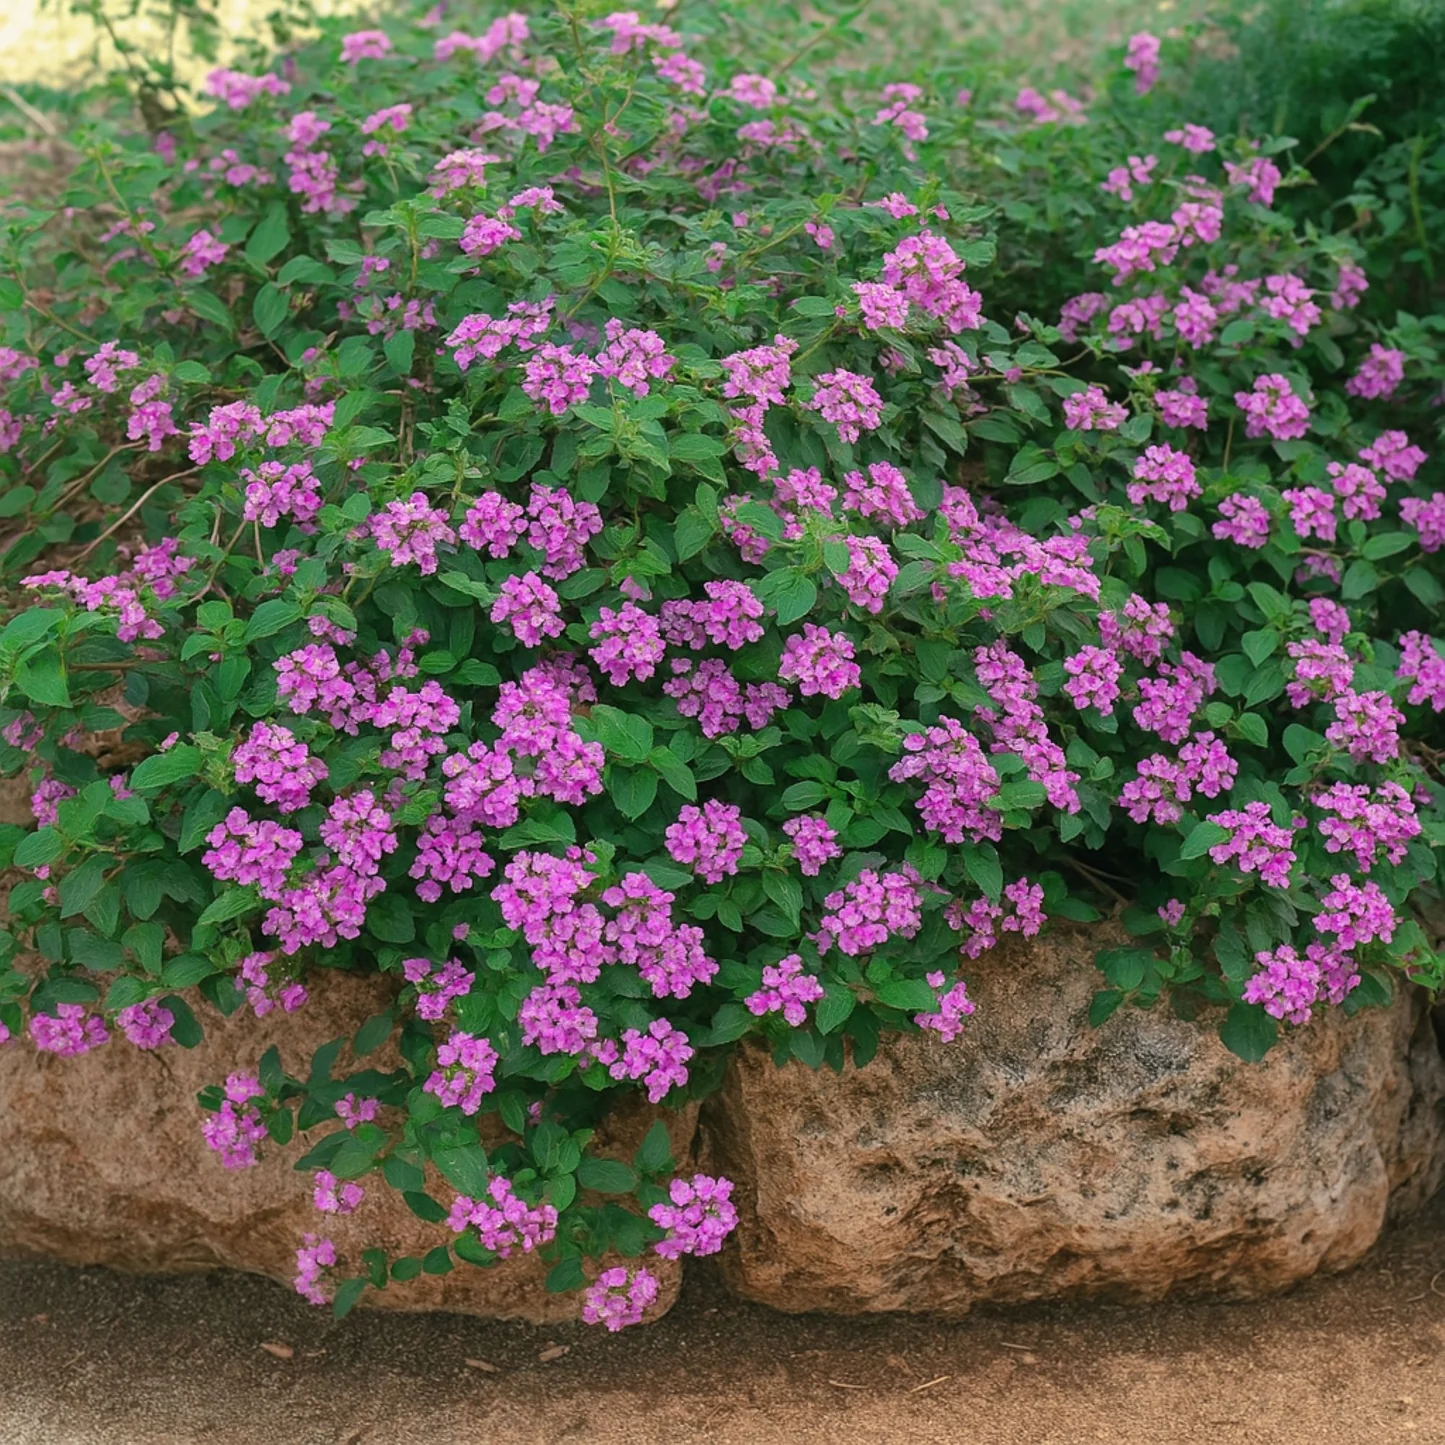
Trailing Lantana
Purple or white flowers spring through fall and a magnet for butterflies. Spreads 4 to 6 feet per plant. It can get nipped back on a frosty night, just cut it back in late February and it flushes right back out.
Trailing Indigo Bush
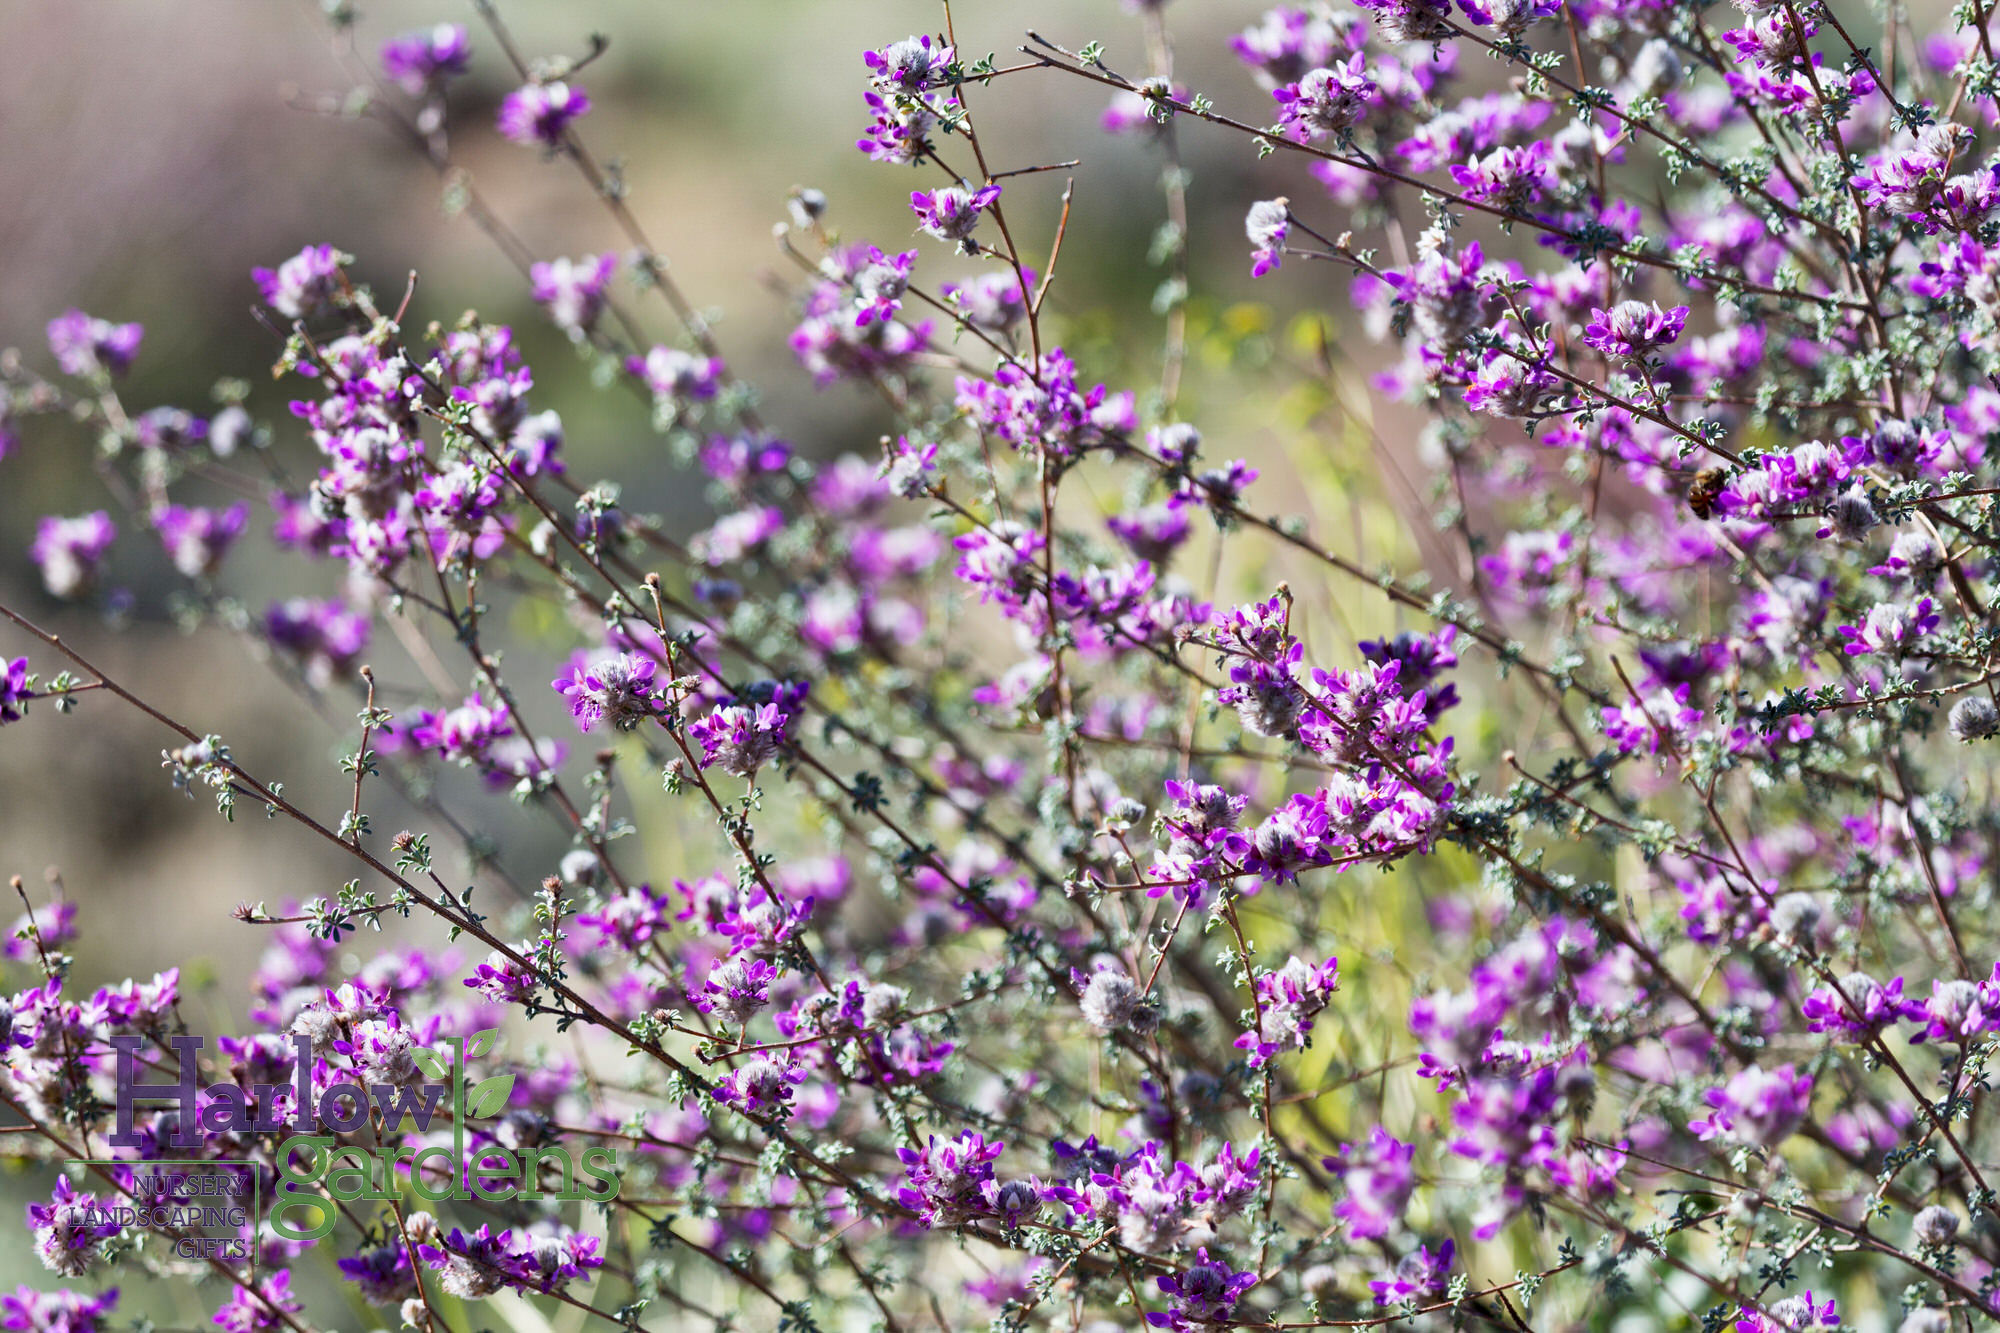
Native to the Chihuahuan Desert. Silvery gray foliage that hugs the ground with small purple flowers in spring. One of the lowest water ground covers there is and it handles reflected heat off a wall or sidewalk really well.
Damianita
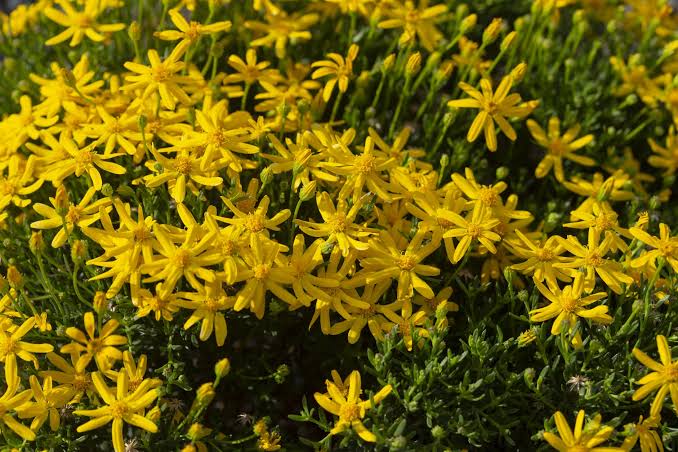
Low, tidy mound of fine green foliage covered in golden yellow flowers in spring and again in fall. Stays about a foot tall and 2 feet wide. Great for a clean border along the sidewalk.
Trailing Rosemary
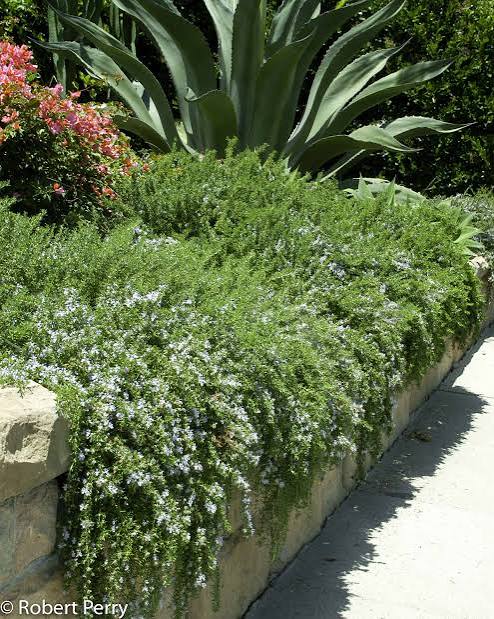
Spills and spreads 4 to 6 feet with blue flowers that bees love in winter and spring. Takes full sun and reflected heat, and you can cook with it.
Emu Bush (Outback Sunrise)
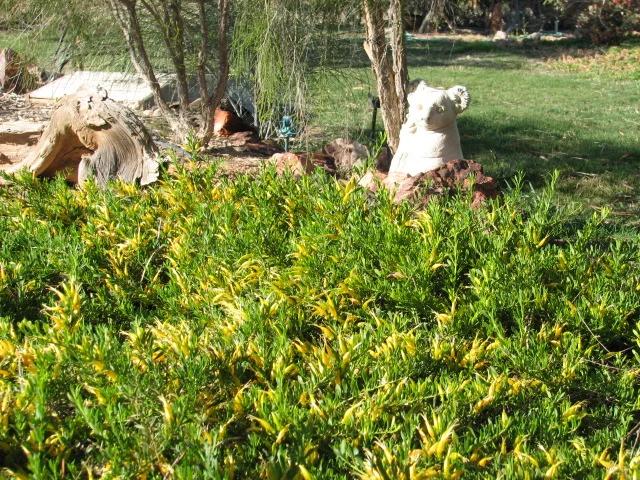
Low, spreading Australian native that stays under a foot tall and spreads 4 to 6 feet. Gray green leaves with orange red tubular flowers through winter and spring that hummingbirds love. Takes full sun and reflected heat, and takes less water than plants that aren't desert adapted.
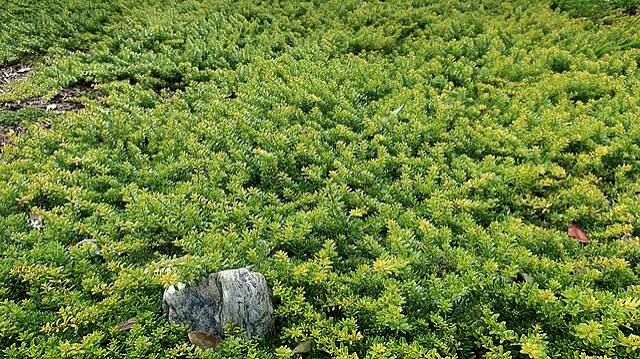
Myoporum
Dense green mat that spreads 6 to 9 feet wide per plant with small white flowers. Fastest option here for covering a lot of ground with fewer plants. Space them 5 to 6 feet apart.
You can't fit all of these. Pick two or three favorites and repeat them down the length of the wall.
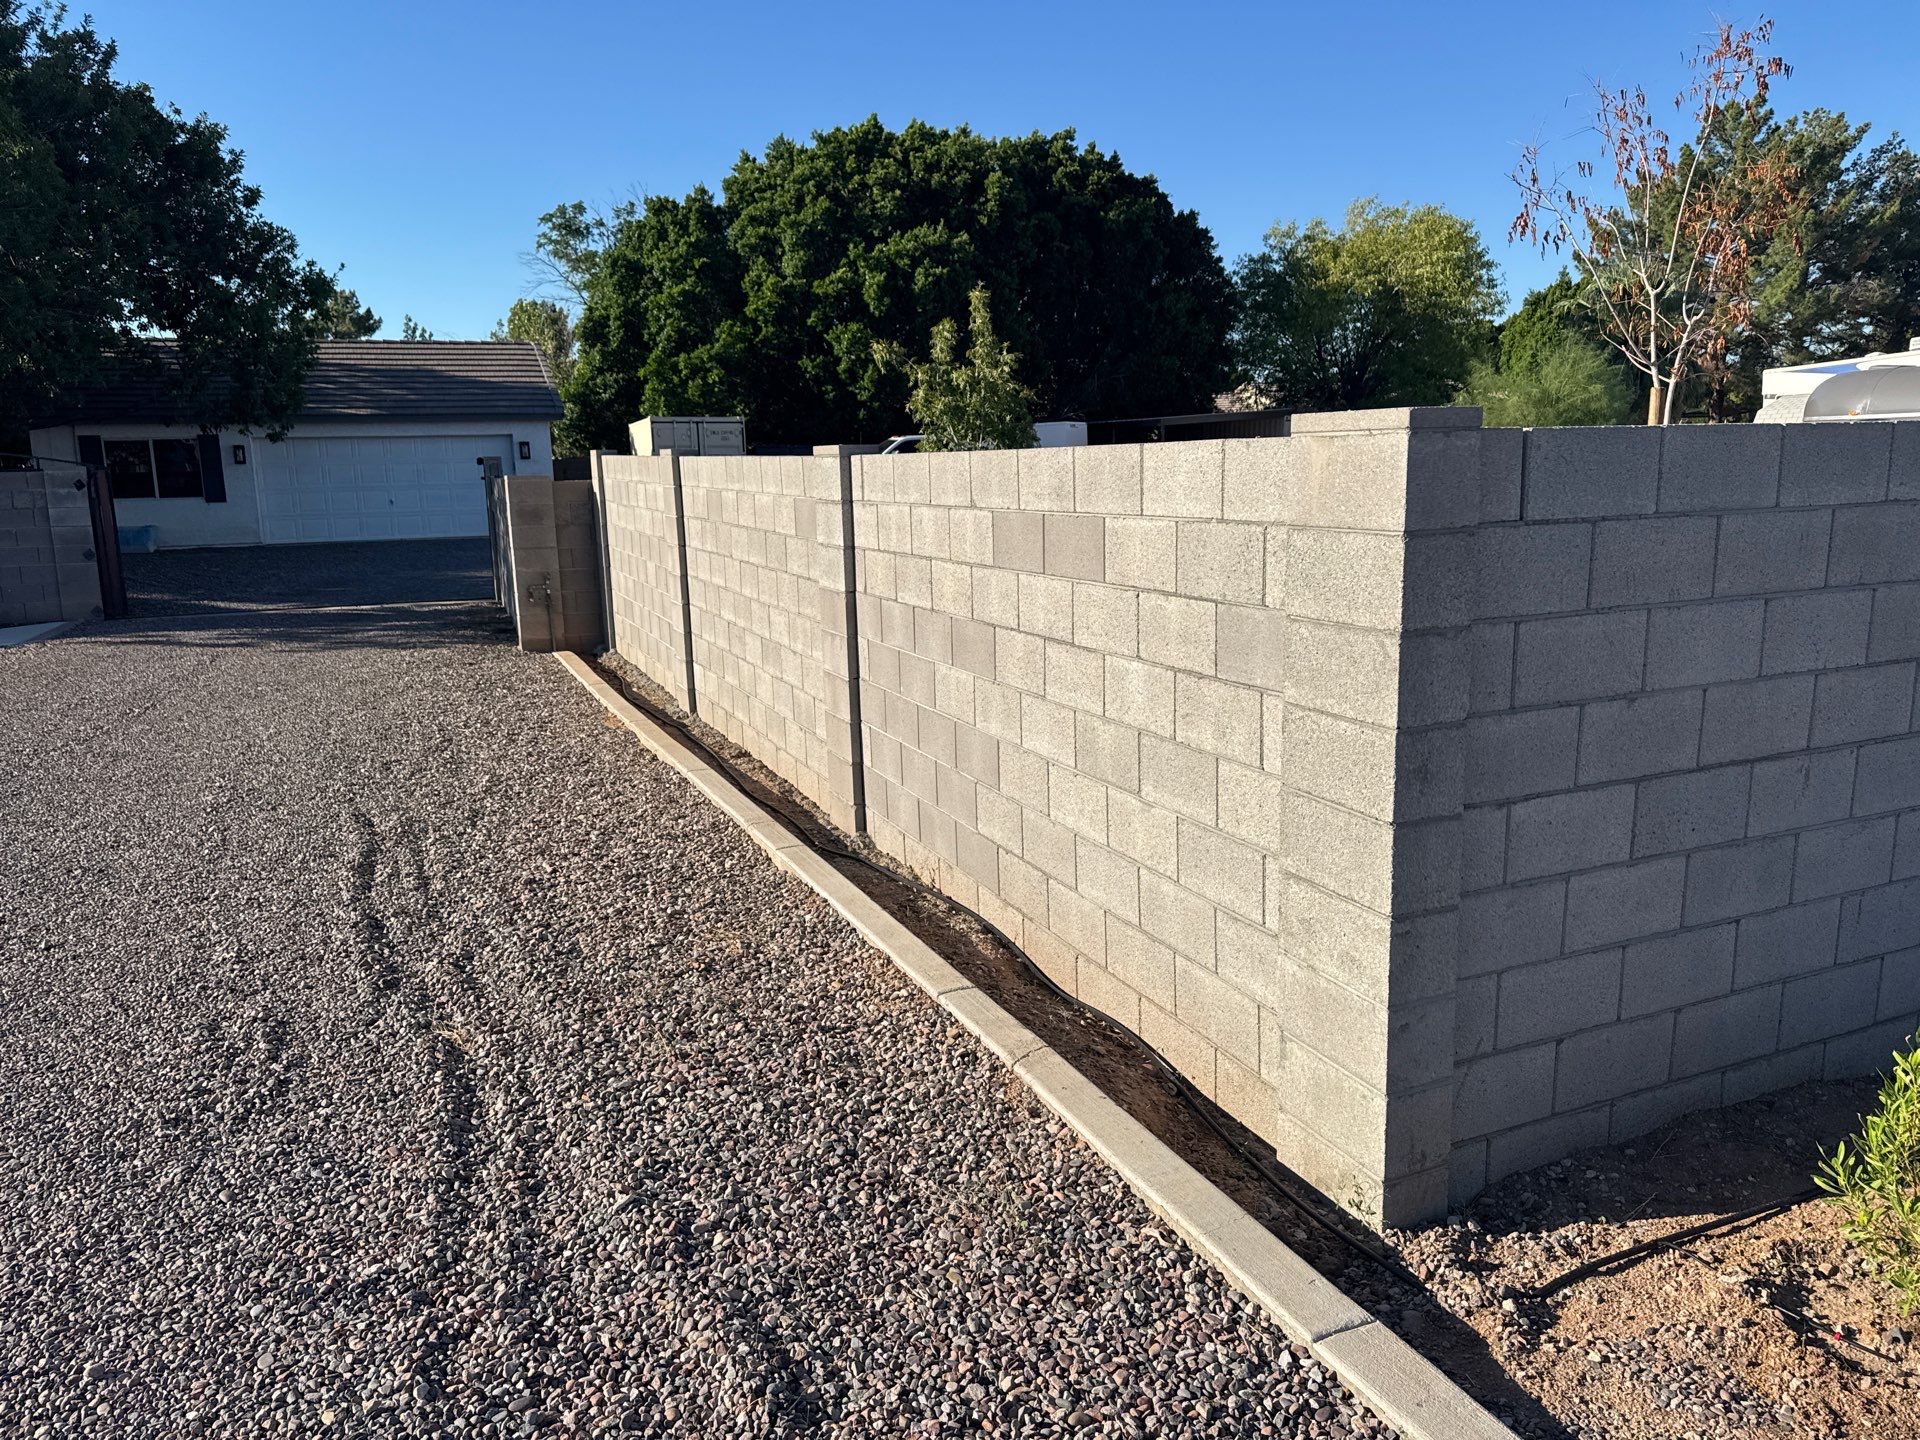
Extending the hopseed hedge
You asked if extending the hopseed hedge along this wall was a good option, and it definitely is. There's plenty of room, and continuing it here ties the front together with one clean, consistent hedge.
- Timing: fall is the best time to plant here. Roots grow all winter before the heat comes.
- Planting: backfill with the native soil plus a tiny bit of compost in the hole, lay compost on top of the soil, then mulch over the compost. Don't work it in, and keep the mulch a foot back from the trunk.
- Water: new plants need deep water two to three times a week the first few weeks, then taper to match the rest of the hedge. Make sure the new section gets emitters on the same line. If the drip needs extending, Garrett can do that: 480-678-9121.

Hopseed
Fast growing native evergreen that fills in to a dense 8 to 12 foot screen. Takes less water than plants that aren't desert adapted and handles reflected heat off a block wall.
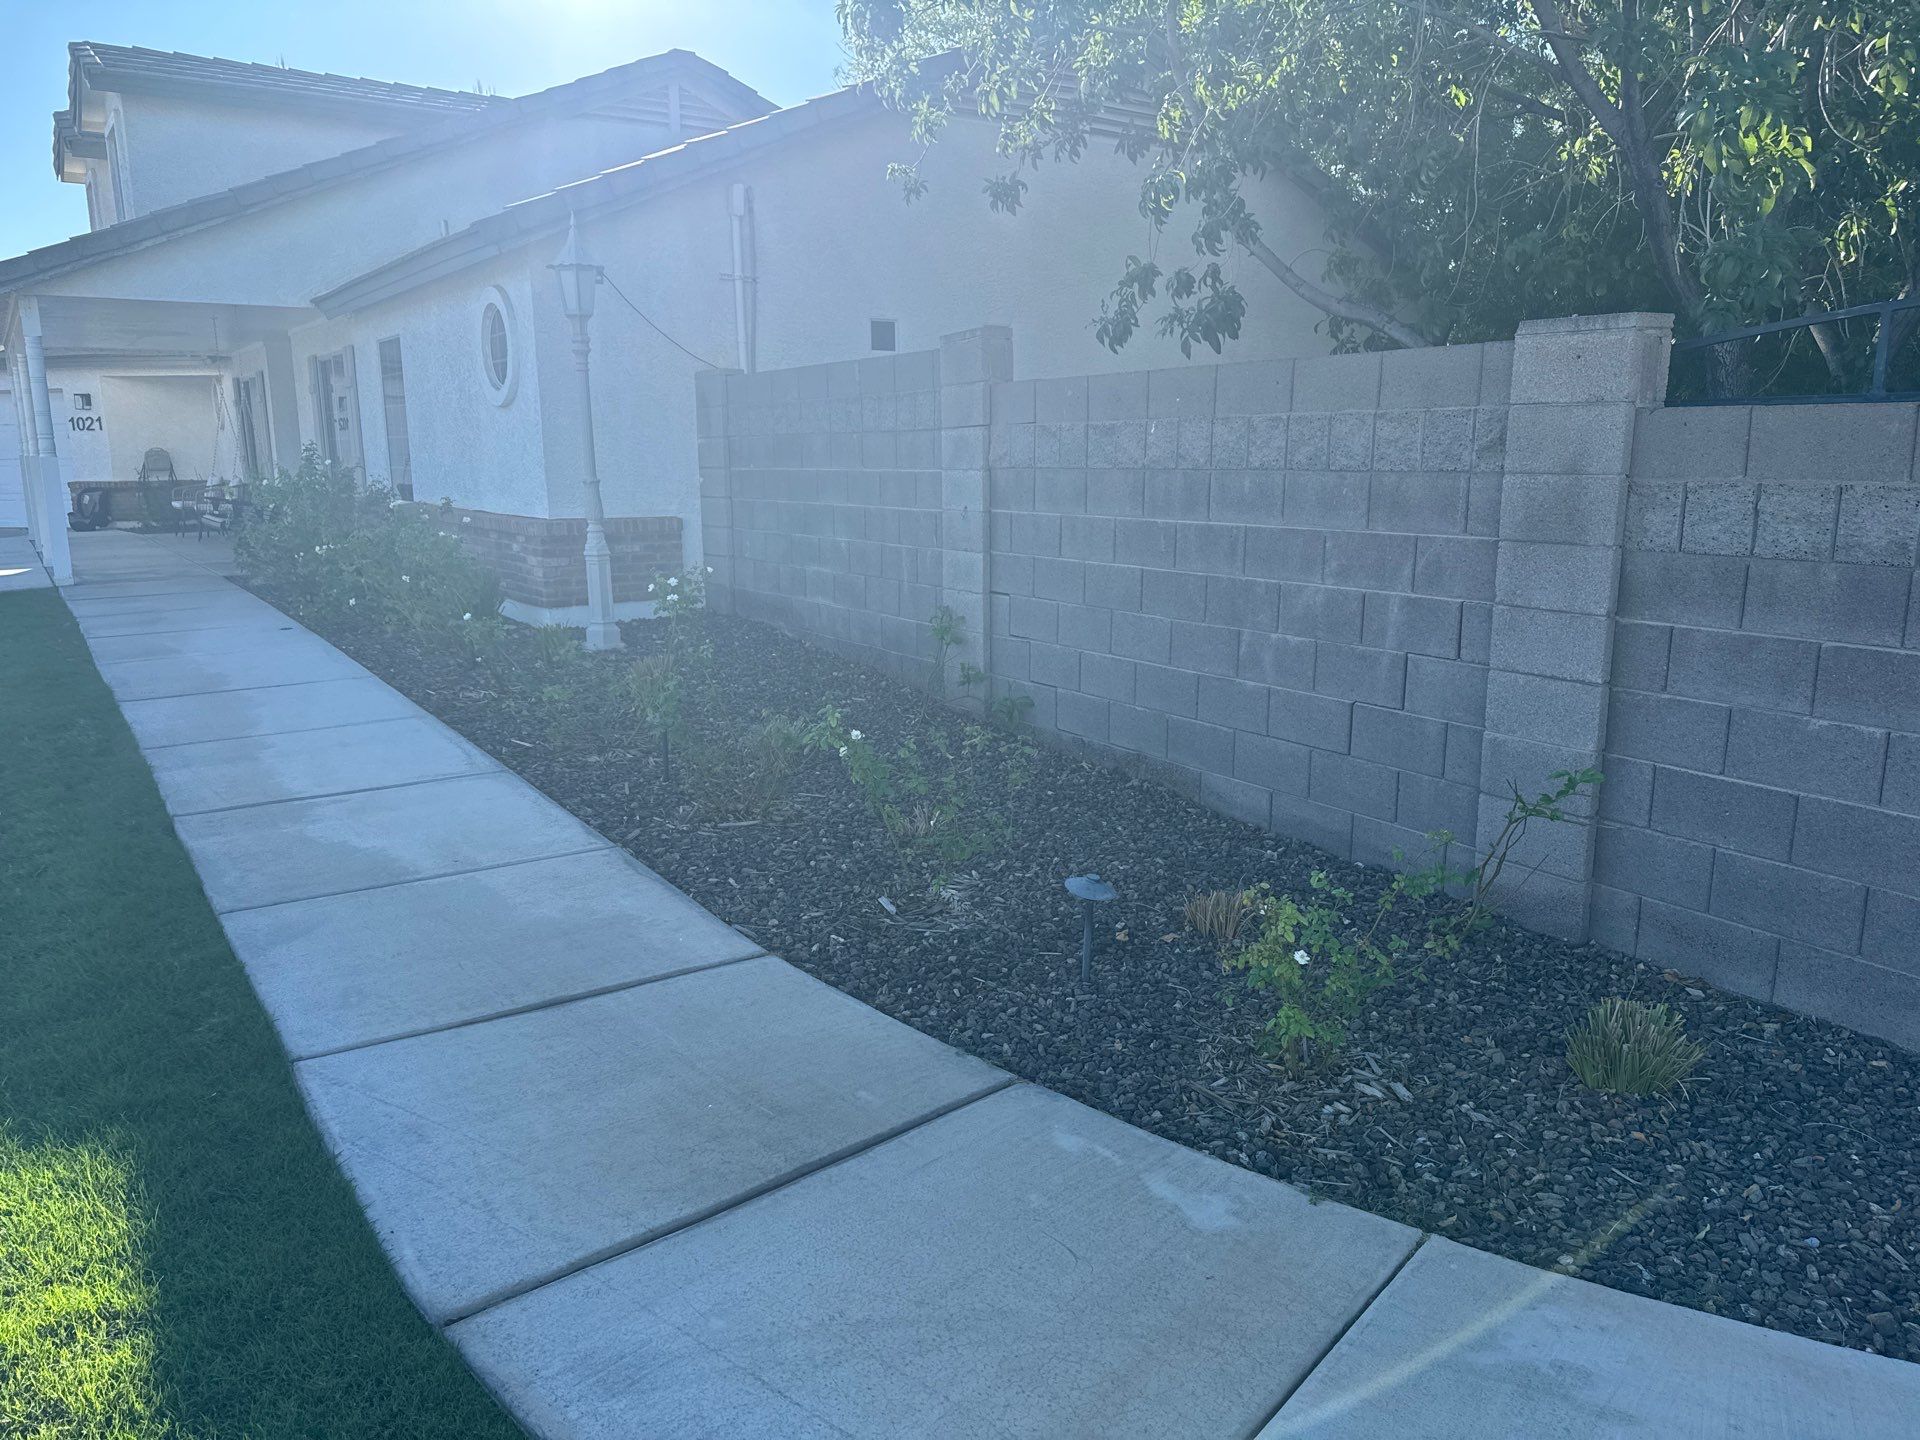
Roses and passion fruit
Here in the front with the roses, pulling the rock back as far as you can and putting mulch down around them will help a lot. Rock soaks up heat all day and radiates it back onto the plants into the night. Mulch does the opposite: it keeps the root zone cool and feeds the soil as it breaks down. Roses really respond to that.
If you can't pull all the rock back, ground covers between and in front of the roses will shade the rock and cool the whole area down.
Ground cover options
Yellow Dot
My favorite for this spot. Fast, bright green mat with little yellow daisy flowers most of the year. Covers ground quickly and cools the soil underneath it. Takes a bit more water than the others on this list, so it does best where it gets some afternoon relief or steady drip.
Trailing Lantana
Purple or white flowers spring through fall and a magnet for butterflies. Spreads 4 to 6 feet per plant. It can get nipped back on a frosty night, just cut it back in late February and it flushes right back out.
Trailing Indigo Bush
Native to the Chihuahuan Desert. Silvery gray foliage that hugs the ground with small purple flowers in spring. One of the lowest water ground covers there is and it handles reflected heat off a wall or sidewalk really well.
Damianita
Low, tidy mound of fine green foliage covered in golden yellow flowers in spring and again in fall. Stays about a foot tall and 2 feet wide. Great for a clean border along the sidewalk.
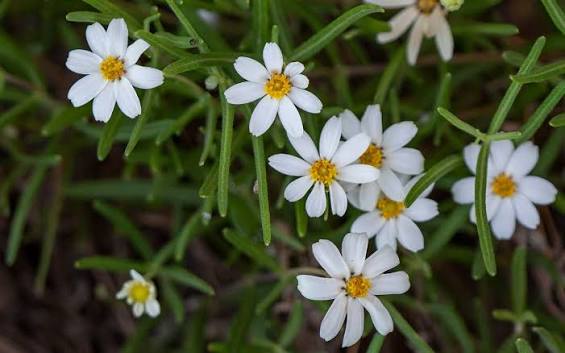
Blackfoot Daisy
Native, white daisy flowers almost all year, stays under a foot tall. The one thing it hates is being overwatered, so keep it on a lean watering schedule.
Trailing Rosemary
Spills and spreads 4 to 6 feet with blue flowers that bees love in winter and spring. Takes full sun and reflected heat, and you can cook with it.
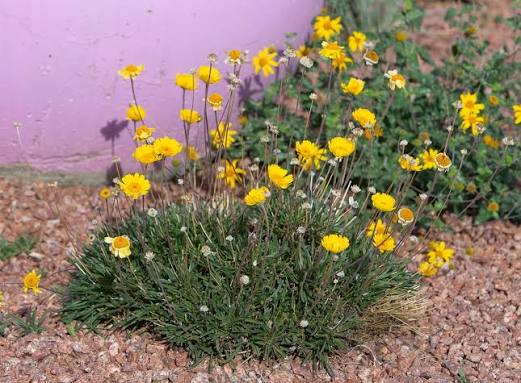
Angelita Daisy
Compact mound of grassy foliage with yellow daisies on and off all year. About a foot tall and wide. Nice to repeat in clusters of three for a cleaner look.
Myoporum
Dense green mat that spreads 6 to 9 feet wide per plant with small white flowers. Fastest option here for covering a lot of ground with fewer plants. Space them 5 to 6 feet apart.
Yellow dot is my favorite here. You can't fit all of these, so pick a couple that you like and keep them a couple feet away from the base of each rose.
A vine for the wall behind
You asked about a vine for the wall behind the roses. Two that work well here:

Creeping Fig
Self clinging, so no trellis needed. Grows into a flat, dense green wall that cools the block and the bed in front of it. Plan on trimming it once or twice a year to keep it off the roof line and away from windows.
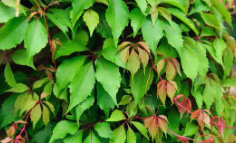
Hacienda Creeper
Also self clinging. Looks a lot like Boston ivy, with leaves that turn red in fall. Handles full sun and heat off a block wall, and it's easier to keep in check than creeping fig.
Plant them a foot or so off the wall with the vine leaned in toward it. They grab on by themselves once they reach the block.
Feeding the roses
Roses are heavy feeders, and they respond fast to living soil. Use the same approach on them as everything else, with the compost closer in like a shrub.
Feeding: everything you need to do it yourself
Here's the exact approach I use, so you can do this yourself on the roses and passion fruit. Feeding is really about feeding the soil life. Fungi, bacteria, and worms break down organic matter and hand nutrients to the roots, which is what keeps plants strong without synthetic fertilizers.
- Compost, and be generous. On trees, spread it in a wide ring around the drip line, the outer edge of the canopy where most of the feeder roots are, from about halfway in to a couple feet past the edge. On shrubs, put it closer in, from a few inches off the stems out about a foot past the edge of the plant. Go 1 to 2 inches deep, and if you're unsure, go thicker rather than thinner. You really can't overdo quality compost. Do this three times a year: late winter (February), early summer (May), and fall (October).
- Worm castings every quarter. Every three months, scatter worm castings over the same areas: a few cups around each shrub and a couple pounds around the drip line of each tree. Castings are loaded with beneficial microbes that bring the soil to life. When it lines up with a compost round, put the castings down first and the compost right over them.
- A good organic fertilizer high in fulvic acid. Look for an organic fertilizer that lists fulvic acid on the label. Fulvic acid helps roots take up nutrients, including the iron and other micronutrients that cause yellow leaves when they're missing, and it feeds the soil life too. Apply it at the label rate on the schedule it gives. Liquid versions can go on monthly with a watering can or hose end sprayer.
- Water it all in. Give everything a deep watering right after you put it down so it soaks into the root zone.
- Mulch over the top. Mulch goes over the compost to keep it moist and cool so the soil life can do its work. Hold it a foot back from trunks and stems. No need to work any of it into the soil.
Compost, worm castings, and mulch are all at Arizona Worm Farm. If you'd rather not do it yourself, our monthly fertilizing program handles all of this for you. Details are in the Soil and Feeding section below.
The passion fruit: very deep, infrequent watering
The passion fruit back here will do best with very deep, infrequent watering. Short, frequent waterings keep the roots shallow near the hot surface. Deep soaks with time to dry out in between train the roots to go down where the soil stays cooler and moister.
- Water slowly and long, until the soil is wet 18 to 24 inches down. You can check by pushing a long screwdriver or soil probe in. It slides easily through wet soil and stops where it's dry.
- Let the top few inches dry out before watering again.
- In the cool season that's usually every 7 to 10 days. In summer it'll be two to three deep soaks a week.
- Mulch the root zone, a foot back from the stem, and feed it the same way as the roses above.
- If a frost is in the forecast, cover it overnight with frost cloth.

Passion Fruit
Fast growing vine with showy flowers and fruit through summer and fall. Deep, infrequent watering keeps the roots down where the soil is cooler.

Roses
Pulling back rock, adding mulch, and feeding with compost and organics keeps the roots cool and the soil alive.
Soil and feeding
Nearly everything in this write-up comes back to the soil. Healthy soil full of fungi, bacteria, and worms is what lets the citrus pull up nutrients, what helps the recovering trees bounce back, and what keeps the roses and lawn going strong. I want you to have everything you need to do this yourself, so here's the full yearly routine in one place.
- Compost three times a year (February, May, October). Be generous. Spread it 1 to 2 inches deep around the drip line of every tree, and closer in around shrubs and roses. Quality compost from Arizona Worm Farm is what I recommend.
- Worm castings every quarter over the same areas, put down before the compost when the timing lines up.
- An organic fertilizer high in fulvic acid, applied at the label rate on its schedule. Liquids can go on monthly.
- Water everything in deeply each time you feed.
- Mulch over the compost, held a foot back from trunks and stems.
If you'd rather we handle it, our monthly landscape fertilizing program feeds the whole yard: trees, citrus, hedges, roses, and the lawn.
- Monthly compost based liquid feeding across the full landscape
- Compost applications three times a year
- A recap video sent to you after each visit
Quick reference
Compost, mulch and worm castings
Arizona Worm FarmArborist for the ash tree
King's Tree ServiceIrrigation and turf
Garrett: 480-678-9121St. Augustine sod
Evergreen Turf or West Coast TurfRoot flare video
Why the root flare mattersQuestions
Ask me anytime in the Garden Nerd ClubNext steps
You can take this list and do it yourself, and I'm right there in the Garden Nerd Club if you want a second set of eyes along the way. If you'd rather have us handle the planting, like the hopseed extension and ground covers, I can put together a planting proposal for you.
For anything irrigation or turf related, call Garrett at 480-678-9121.
You can see more of what we do on our planting services page.